
If you’ve ever wondered how video game characters, animated movies, or 3D-printed objects are made, the answer is 3D modeling. This technology allows artists, designers, and engineers to create three-dimensional digital objects that can be used in games, films, architecture, and product design.
For those just starting out, the biggest question is often, “Is 3D modeling hard?” The truth is, like any skill, it takes time and practice. However, with the right approach, learning 3D modeling can be an exciting and rewarding journey.
In this guide, you’ll learn the basics of 3D modeling, what software to use, and how to start creating your own 3D models step by step. Whether you’re an artist, engineer, or just curious, this guide will help you take your first steps into the world of 3D design.
What is 3D Modeling?
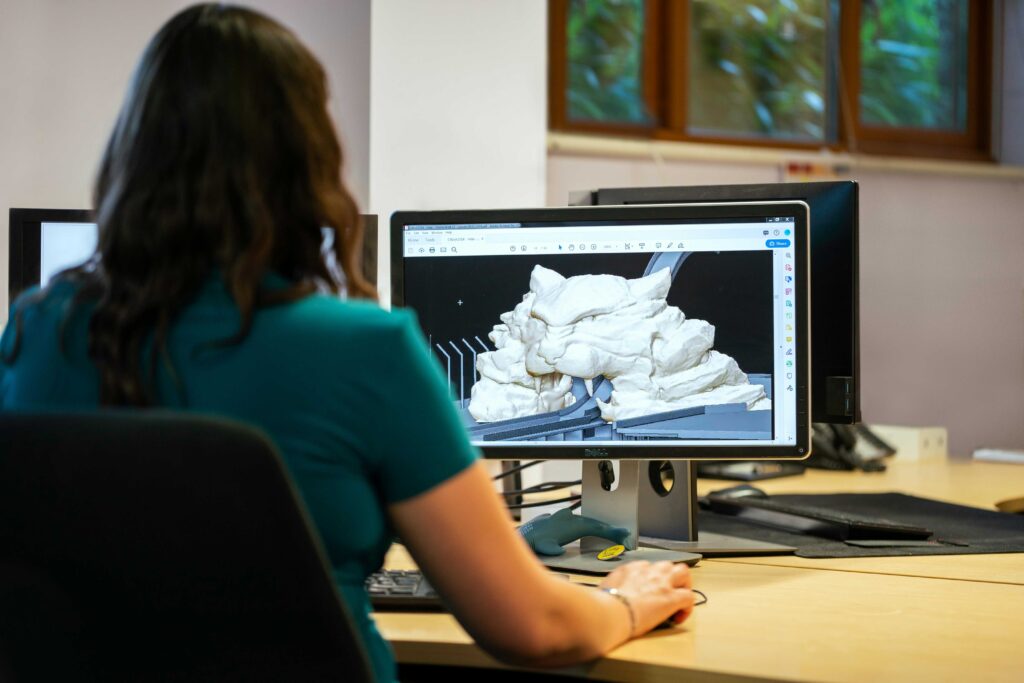
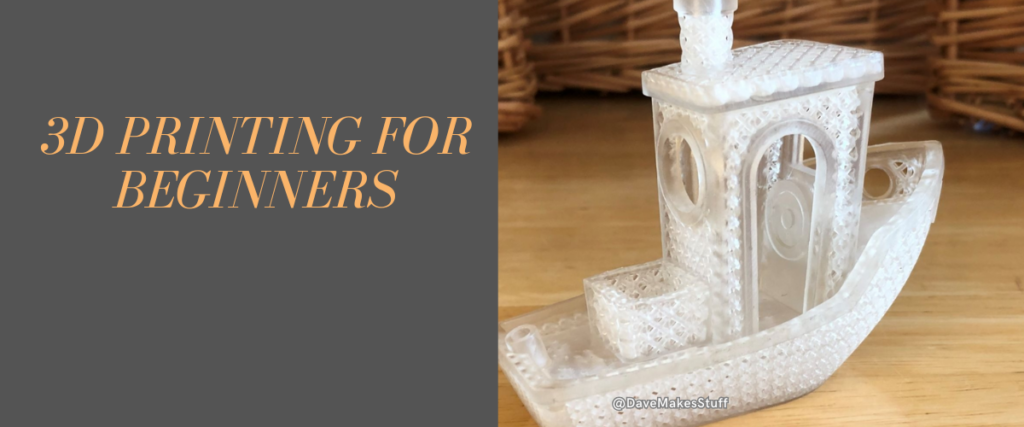
3D printing: Turning digital designs into real-world objects, one layer at a time. Photo by ThisIsEngineering
At its core, 3D modeling is the process of creating digital objects that exist in three dimensions—height, width, and depth. Unlike traditional 2D images, which are flat, 3D models can be rotated, resized, and viewed from any angle.
These digital models are used in a variety of industries:
- Gaming and Animation – Video game characters, environments, and special effects.
- Movies and Visual Effects – 3D animation in films and CGI effects.
- Architecture and Interior Design – Creating 3D representations of buildings and spaces.
- Engineering and Product Design – Designing prototypes and manufacturing components.
- Medical and Scientific Visualization – Simulating organs, surgeries, and complex biological structures.
- 3D Printing – Turning digital designs into physical objects.
In each of these fields, 3D modeling software helps transform ideas into detailed, lifelike objects. The possibilities are endless, making it a valuable skill for both creative and technical professionals.
If you’re a complete newbie, we highly recommend reading our detailed blogs, “How Does 3D Printing Work?” and “Resin vs. Filament 3D Printing.” These guides will help you understand the fundamentals of 3D printing, the differences between resin and filament printers, and which option is best for your needs.
Now that you understand what 3D modeling is, let’s go over its fundamentals so you can start your journey.
Basics of 3D Modeling
Before you start creating your own 3D models, it’s important to understand the key components that make up a 3D object. Here are the essential elements:
1. Meshes and Polygons
Every 3D model is made up of a structure called a mesh. A mesh consists of small geometric shapes, usually polygons, that form the outer surface of the object. The most common type of polygon is a triangle or quadrilateral, which are used to create complex shapes.
2. Vertices, Edges, and Faces
A vertex is a single point in space that serves as the foundation of a 3D model. When you connect two vertices, you get an edge, and when you connect multiple edges, you form a face. These faces combine to create the surface of your 3D model.
3. Textures and Materials
Once you’ve built the shape of your 3D model, it needs textures and materials to make it look realistic. A texture is a 2D image applied to the surface of the object, while materials define how the object interacts with light and shadows. This step is essential for making your model appear detailed and lifelike.
4. Rendering and Lighting
After modeling and texturing, the final step is rendering. This is the process of converting the 3D scene into a final image or animation. Proper lighting is crucial because it adds depth, highlights textures, and makes the model look more realistic.
How to Learn 3D Modeling as a Beginner
Starting your journey in 3D modeling for beginners might seem overwhelming, but with the right approach, you can make steady progress. The key is to learn step by step, focusing on fundamental concepts before diving into complex designs. Here’s how you can get started:
1. Choose the Right Learning Method
There are multiple ways to learn 3D modeling, depending on your learning style and goals:
- Self-Learning (Free Resources) – If you prefer learning at your own pace, platforms like YouTube, Blender Guru, and CG Cookie offer high-quality tutorials on how to do 3D modeling for free.
- Online Courses – Websites like Udemy, Coursera, and Skillshare provide structured courses that guide you through the basics to advanced techniques.
- Formal Education – If you plan to become a professional 3D artist, enrolling in a 3D modeling or game design program at a university or technical school may be beneficial.
For most beginners, starting with free tutorials and online courses is the best way to learn without any upfront investment.
2. Pick Beginner-Friendly 3D Modeling Software
Selecting the right 3D modeling software for beginners is crucial to your learning experience. Some tools are easier to grasp, while others require a steep learning curve. Here are the best options to start with:
- Tinkercad – The simplest option, ideal for absolute beginners and kids. It’s free and runs in a web browser.
- Blender – A powerful, free tool for beginners and professionals alike. It covers everything from basic modeling to animation and rendering.
- SketchUp – Best suited for architectural modeling and interior design.
- Fusion 360 – Great for engineering and product design, offering parametric modeling.
- ZBrushCoreMini – A beginner-friendly tool for digital sculpting.
For most beginners, Tinkercad or Blender are the best choices because they are free and have vast online communities offering support and tutorials.
3. Understand the Fundamentals First
Before jumping into creating complex characters or objects, take time to understand how to make 3D models for beginners by practicing these basics:
- Manipulating Basic Shapes – Learn how to move, rotate, and resize objects.
- Using Extrusion & Boolean Operations – These help you create more complex shapes from simple forms.
- Working with Materials & Textures – Understanding how to apply colors, patterns, and textures will make your models look more realistic.
- Exploring Lighting & Rendering – Even simple objects can look professional with proper lighting.
4. Practice with Simple Projects
Learning how to get better at 3D modeling requires consistent practice. Start with small, simple projects before attempting complex designs.
Here are some beginner-friendly modeling projects:
- A coffee mug – A great first project to practice working with cylinders and handles.
- A simple house – Helps you understand how to create walls, windows, and roofs.
- A chess pawn – Teaches you about curves and symmetry.
- Basic furniture – Practice making tables, chairs, and bookshelves.
- Low-poly trees and rocks – Ideal for game assets and learning about organic modeling.
By practicing these basic models, you’ll build confidence and develop the foundational skills needed for more advanced 3D modeling projects.
How to Make 3D Models for Beginners
Creating a 3D model involves multiple steps such as conceptualization, modification ,and rendering.
Now that you have a grasp on the basics, let’s walk through the step-by-step process of making a 3D model. While the details may vary depending on the software you use, the general workflow remains the same.
Step 1: Conceptualize Your Model
Before opening any 3D modeling software, think about what you want to create. Many professionals sketch their designs on paper first to plan out proportions and details.
If you’re unsure where to start, use reference images. Websites like Pinterest, ArtStation, and Google Images can provide inspiration for your first 3D models.
Step 2: Start with Basic Shapes
Most 3D modeling software allows you to start with basic geometric shapes like cubes, spheres, and cylinders. These primitive shapes serve as the foundation of your model.
For example, if you’re making a coffee mug, start with a cylinder for the body and a torus or extruded shape for the handle.
Step 3: Modify the Shape
Once you have the basic form, modify it using key modeling techniques:
- Extrusion – Extending a shape by pulling its faces outward.
- Scaling & Rotating – Adjusting proportions and angles.
- Boolean Operations – Combining or subtracting shapes to form complex objects.
- Subdivision & Smoothing – Making models appear more detailed and realistic.
At this stage, you’ll begin shaping your object into a recognizable form.
Step 4: Add Textures & Materials
After shaping your 3D model, it needs textures and materials to look realistic. Many 3D modeling software for beginners provides built-in textures, but you can also create custom ones using image files or texture painting tools.
For example, if you’re modeling a wooden chair, you can apply a wood texture to give it a natural appearance.
Step 5: Set Up Lighting & Shadows
Lighting is one of the most important steps in making a 3D model look good. Even a simple object can look professional with the right lighting setup. Beginners should start with basic three-point lighting:
- Key Light – The primary light source that defines the shape.
- Fill Light – Softens shadows and adds depth.
- Back Light – Creates contrast and separates the model from the background.
Playing with light intensity, angles, and color can dramatically improve the realism of your 3D models.
Step 6: Render Your Model
Rendering is the final step where the software processes your model into a final image or animation. Depending on your computer and software, rendering can take seconds or hours, especially for complex scenes.
If you’re using Blender, you can experiment with Eevee (fast rendering) or Cycles (realistic rendering) to see how different render engines affect the final look.
Step 7: Export & Share Your Model
Once you’re satisfied with your model, you can export it in different file formats depending on how you plan to use it:
- STL or OBJ – For 3D printing.
- FBX or GLTF – For use in game engines like Unity or Unreal Engine.
- PNG or JPEG – For simple renders or portfolio images.
At this stage, you’ve successfully created a 3D model from scratch!
Best 3D Modeling Software for Beginners
Choosing the right 3D modeling software is essential when starting out. Some programs are easier to learn, while others offer advanced features for professional use. Below are the best options depending on your needs and goals.
1. Tinkercad (Best for Absolute Beginners & Kids)
If you’re completely new to 3D modeling, Tinkercad is the perfect place to start. It’s an easy-to-use, browser-based program that lets you create models using basic geometric shapes. You don’t need to install anything—just log in and start designing.
Best for:
✔ Kids and beginners with no prior experience
✔ Learning the basics of how to do 3D modeling
✔ Designing models for 3D printing
Limitations:
- Lacks advanced tools for complex designs
- Not ideal for animation or high-detail models
2. Blender (Best Free All-in-One Software)
Blender is one of the most powerful free tools for 3D modeling, animation, and rendering. While it has a steeper learning curve, it’s widely used by professionals and offers endless possibilities for modeling, sculpting, and texturing.
Best for:
✔ Creating game assets, animations, and product designs
✔ Practicing organic modeling & sculpting
✔ Learning industry-standard techniques
Limitations:
- Can be overwhelming for beginners
- Requires time to learn key shortcuts and workflows
3. SketchUp (Best for Architectural Modeling)
If you’re interested in architectural design or interior modeling, SketchUp is an excellent choice. It’s easy to use and great for creating houses, furniture, and layouts.
Best for:
✔ Designing buildings and interiors
✔ Rapid prototyping for furniture and product design
✔ Simple interface for beginners
Limitations:
- Not ideal for animation or game modeling
- The free version has limited tools
4. Fusion 360 (Best for Engineering & Product Design)
Fusion 360 is a professional-grade CAD (Computer-Aided Design) software used in engineering and 3D printing. Unlike other programs, it focuses on precision modeling rather than artistic sculpting.
Best for:
✔ Creating mechanical parts and engineering prototypes
✔ Designing objects for 3D printing
✔ Learning professional parametric modeling
Limitations:
- More technical and less artistic
- Free for personal use, but commercial licenses are paid
5. ZBrushCoreMini (Best for Digital Sculpting)
If you want to create characters, creatures, or organic shapes, ZBrushCoreMini is a great entry point into digital sculpting. Unlike traditional modeling, sculpting allows you to “shape” a model like clay instead of working with rigid polygons.
Best for:
✔ Creating detailed characters & organic models
✔ Practicing digital sculpting techniques
✔ Learning the basics before upgrading to ZBrush Pro
Limitations:
- Focuses only on sculpting (not full 3D modeling)
- Limited tools compared to ZBrush Pro
6. Other Notable Mentions
- SelfCAD – A beginner-friendly CAD modeling tool
- 3D Slash – Fun and block-based, similar to Minecraft modeling
- Onshape – A browser-based CAD tool with collaboration features
Which Software Should You Choose?
If you’re a complete beginner, start with Tinkercad or Blender. If you’re interested in architecture, use SketchUp, and if you’re into engineering, go for Fusion 360. As you get better, you can explore advanced tools like Maya, 3Ds Max, or ZBrush.
Things to 3D Model for Beginners
Now that you have the right 3D modeling software, it’s time to start practicing. But what should you create first? Simple models help you develop fundamental skills without getting overwhelmed.
1. Simple Geometric Objects
Start with basic shapes like cubes, spheres, and cylinders. Try adjusting their size, rotation, and position. Understanding these transformations is essential before moving on to complex models.
2. Everyday Objects
Looking around your home can give you plenty of ideas for 3D modeling. Try creating:
- A coffee mug – Teaches you how to model cylinders & extrusions
- A dice – Helps you understand basic topology & face alignment
- A light bulb – Introduces you to curved modeling
3. Simple Furniture Pieces
Furniture models are great for learning proportions and scale. Try designing:
- A chair – Teaches you how to create legs, seats, and supports
- A table – Helps with precision & alignment
- A bookshelf – Great for practicing dimensions & modular design
4. Chess Pieces
A chess pawn is an excellent project for learning about symmetry and curves. Once you master the pawn, try making a bishop, knight, or queen to challenge yourself.
5. Basic Game Assets
If you’re interested in game development, start with low-poly models such as:
- Trees
- Rocks
- Swords
- Treasure chests
6. 3D Printable Objects
If you have access to a 3D printer, try designing:
- A keychain – Simple, customizable, and easy to print
- A phone stand – Practical and useful
- Customized jewelry – Rings, pendants, or bracelets
7. Cartoon Characters & Robots
For those interested in character modeling, start with a simple robot. Robots are great because they are made of basic shapes like cylinders and cubes. Once you’re comfortable, you can move on to cartoon characters with organic forms.
How to Get Better at 3D Modeling
Once you’ve learned the basics of 3D modeling, the next challenge is improving your skills. Like any creative field, practice, patience, and problem-solving are essential. Here are some effective ways to level up your 3D modeling abilities.
1. Practice Regularly
The best way to improve at 3D modeling for beginners is to practice consistently. Start with small projects, experiment with different shapes, and gradually increase complexity. The more time you spend modeling, the more intuitive the process becomes.
2. Follow Online Tutorials
There are countless free and paid tutorials available online that can help you learn new techniques. Some great resources include:
- YouTube channels like Blender Guru, Grant Abbitt, and CG Geek
- Online courses from Udemy, Coursera, or Skillshare
- Forums & communities like Polycount, CGSociety, and r/3Dmodeling on Reddit
Following along with tutorials teaches you new methods while helping you understand how professionals approach modeling.
3. Master Keyboard Shortcuts
Every 3D modeling software has keyboard shortcuts that speed up your workflow. Learning these shortcuts will help you work faster and more efficiently. For example, in Blender:
- G – Move an object
- R – Rotate an object
- S – Scale an object
- Ctrl+Z – Undo
Memorizing these commands will make you much faster and more productive.
4. Analyze Real-World Objects
To create realistic 3D models, start observing real-world objects. Study how different surfaces react to light, how objects are structured, and what details make them look natural.
For example, if you’re modeling a chair, look closely at its curves, materials, and how its legs connect. This will help you create more accurate and believable models.
5. Experiment with Different Modeling Techniques
There are multiple modeling approaches, each suited for different purposes. Try practicing:
- Box modeling – Start with a cube and refine the shape
- Sculpting – Work with organic forms like characters
- Boolean operations – Combine or subtract shapes to create complex models
- Edge loops & topology – Optimize models for animation
The more techniques you explore, the more versatile you’ll become.
6. Work on Small Challenges
One great way to improve is to challenge yourself with small exercises. For example:
- Model a simple object in 30 minutes
- Try recreating a household item in 3D
- Make a low-poly version of a famous character
- Participate in online 3D modeling challenges
These short exercises push you to learn new skills without feeling overwhelmed.
7. Get Feedback & Join a Community
Joining a 3D modeling community helps you learn from others, get feedback, and stay motivated. Share your work on platforms like:
- ArtStation
- Sketchfab
- DeviantArt
- Reddit (r/3Dmodeling, r/Blender)
Receiving constructive criticism from experienced modelers helps you spot mistakes and improve faster.
8. Learn Texturing, Lighting, and Rendering
Creating a 3D model is just one part of the process. Learning how to apply textures, set up lighting, and render a final image will make your models look more professional.
Experiment with:
- UV Mapping – Properly wrapping textures around a model
- PBR Texturing – Creating realistic materials using roughness, metallic, and specular maps
- Lighting Techniques – Setting up realistic shadows and highlights
- Rendering Settings – Adjusting samples, ray tracing, and resolution
A well-lit, textured model will always look more impressive than a raw, untextured one.
9. Learn Industry Standards & Advanced Tools
Once you’re comfortable with beginner-friendly software, try learning professional tools like:
- Maya – Used in film & animation
- 3Ds Max – Industry standard for game assets
- ZBrush – Best for sculpting highly detailed models
- Substance Painter – Used for professional texturing
If you’re considering a career in 3D modeling, mastering these industry tools will open up job opportunities in gaming, film, and design.
After you’ve 3D printed your model, there are additional steps you can take to refine and enhance its quality. To learn more, check out our insightful article, “How to Improve 3D Print Quality.” It’s packed with practical tips and techniques to help you achieve smoother, more precise, and professional-looking prints.
How to Make 3D Models with Software
Now that you know how to get better at 3D modeling, let’s go through the step-by-step process of making a 3D model using software.
Step 1: Open Your 3D Modeling Software
Choose a beginner-friendly software like Tinkercad, Blender, or SketchUp and create a new project. If you’re using Blender, select General and delete the default cube to start fresh.
Step 2: Start with a Basic Shape
All 3D models start with a basic shape like a cube, sphere, or cylinder. For example, if you’re modeling a coffee mug, begin with a cylinder.
Step 3: Modify the Shape
Using the software’s tools, adjust your shape by:
- Extruding – Extending parts of the object
- Scaling – Changing the size
- Rotating & Moving – Positioning parts correctly
- Boolean Operations – Combining or subtracting objects
For the coffee mug handle, you might start with a torus shape and attach it to the cylinder.
Step 4: Add Details & Refinements
Once you have the basic structure, refine it by:
- Adding edge loops to define smoother curves
- Using modifiers like Subdivision Surface for smoothness
- Sculpting finer details (if using Blender or ZBrush)
This step helps bring your model to life.
Step 5: Apply Textures & Materials
To make your 3D model look realistic:
- Add materials like metal, wood, or glass
- Use textures (wood grain for a table, fabric for a couch)
- Adjust roughness and glossiness for realism
For example, if you’re modeling a lamp, you might use a metallic texture for the base and fabric texture for the lampshade.
Step 6: Set Up Lighting & Shadows
Lighting makes a huge difference in how your 3D model appears. In Blender, you can:
- Add a point light for simple illumination
- Use a three-point lighting setup for professional renders
- Adjust shadow softness and intensity
If you’re making a glass object, proper lighting will enhance reflections and transparency.
Step 7: Render the Final Model
Rendering is the process where your software generates the final image or animation. In Blender, you can choose:
- Eevee (Fast Rendering) – Good for previews
- Cycles (High-Quality Rendering) – Best for realism
Adjust render settings for resolution, lighting, and material effects to get the best result.
Step 8: Export & Share Your Model
Once your model is complete, export it in different file formats:
- STL – For 3D printing
- OBJ – For sharing and modifications
- FBX – For use in games and animation
- PNG/JPG – If you just want an image of your model
Now, you can showcase your 3D model, whether for personal projects, portfolio work, or game design.
The Future of 3D Modeling
As 3D modeling continues to evolve, its impact on various industries is only growing. With advancements in artificial intelligence, real-time rendering, and virtual reality, 3D technology is becoming more accessible, efficient, and immersive. These innovations are shaping the way designers, engineers, and artists approach their work, leading to faster workflows, more realistic visuals, and entirely new applications for 3D modeling software.
1. AI-Assisted 3D Modeling
Artificial intelligence is beginning to revolutionize 3D modeling by automating repetitive tasks and assisting with design processes. AI-powered tools can generate 3D models from sketches or images, reducing the time required for manual modeling. Machine learning algorithms can also help optimize textures, lighting, and animation, making the process more intuitive for beginners and professionals alike.
2. Real-Time Rendering & Game Development
The gaming industry has already seen a shift toward real-time rendering, allowing artists to see changes to 3D models instantly. Game engines like Unreal Engine and Unity are pushing the boundaries of photorealism in gaming, virtual production, and architecture. As real-time rendering becomes more advanced, designers can create hyper-realistic models without waiting for lengthy rendering times.
3. 3D Modeling in the Metaverse & Web3
With the rise of Web3 technologies and the Metaverse, 3D models are becoming the foundation for virtual worlds, avatars, and digital assets. Companies are investing heavily in VR and AR applications, where 3D modeling software is used to design immersive environments and interactive experiences. This new frontier opens up exciting career opportunities for those skilled in 3D design.
4. Enhanced 3D Printing Applications
3D printing is expanding beyond prototypes and small objects. Advancements in materials and printing technology are enabling the creation of biomedical implants, sustainable housing, and even food products. With custom manufacturing on the rise, mastering 3D modeling for 3D printing can open doors in industries such as medicine, aerospace, and consumer products.
5. Virtual Reality & Augmented Reality Integration
VR and AR are reshaping the way we experience and interact with 3D models. Architects can walk through virtual buildings, product designers can visualize prototypes in real-time, and medical professionals can train with 3D anatomical models. As these technologies continue to develop, 3D modeling skills will be in even higher demand.
Conclusion
3D modeling for beginners is easier than ever with the right tools and approach. By starting with simple software, practicing consistently, and exploring different techniques, anyone can develop the skills to create 3D models for games, animation, architecture, and 3D printing.
If you’re wondering “Is 3D modeling hard?”, the key is patience and practice. With beginner-friendly software like Tinkercad, Blender, and SketchUp, you can start designing today. The demand for 3D modeling skills is growing, making it a valuable skill for creative and technical careers.
After you’ve mastered 3D modeling, you can even start selling your designs for some extra cash. For that, be sure to go through our detailed blogs on 3D printing side hustle, and guide to start selling STL files.