
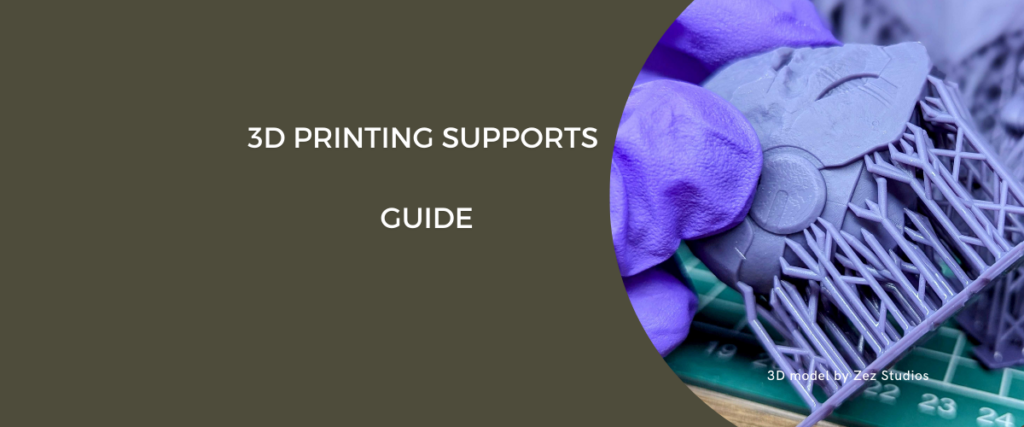
If you’ve ever tried printing a model only to watch it collapse mid-way or end up with sagging, droopy overhangs — you’re not alone. One of the most common challenges in 3D printing is managing unsupported structures. The solution? Support structures.
But here’s the thing — knowing when and how to use 3D printing supports can mean the difference between a successful print and a frustrating failure.
In this guide, we’ll cover exactly what supports are in 3D printing, when you need them, the different types you can use, and smart ways to reduce or avoid them.
Whether you’re printing detailed miniatures, architectural models, or just experimenting, you’ll walk away with practical tips to level up your print quality.
What Are Supports in 3D Printing?

Supports are critical to prevent 3D print failures. 3D model by Zez studios
Supports are temporary structures that your printer creates to hold up parts of your model that can’t stand on their own during printing. Think of them as scaffolding — not part of the final piece, but essential during construction.
Most 3D printers build objects layer by layer. But what happens when a new layer has nothing underneath it? That’s where 3D print supports come in. They fill in the gaps — holding up overhangs, bridges, and other floating features so the print stays stable and accurate.
Once the print is done, the supports are removed — manually, by dissolving them, or with tools — leaving your final model intact. It’s a simple concept, but crucial for clean, successful prints.
Do You Need Supports for 3D Printing?
The short answer? Yes — but not always. Whether or not you need supports in 3D printing depends on two main things: your printer type and your model’s geometry.
For FDM printing, there’s a common rule of thumb called the 45-degree rule. If an overhang on your model extends more than 45 degrees from vertical, it’s likely to sag without support. The same goes for bridges — horizontal spans that stretch between two points. If they’re longer than about 5–10 mm, they’ll likely droop unless supported.
Resin printers, like those using SLA or DLP technology, require support almost all the time. Since resin models are pulled upward from the vat, supports are essential to keep the print attached to the build plate and to prevent warping.
On the other hand, powder-based technologies like SLS and binder jetting don’t need supports. The surrounding powder acts as a natural support during the build process.
So, when should you add supports?
- If your design has overhangs beyond 45°
- If there are long bridges with nothing below
- If you’re printing on a resin printer
- If your model includes floating or disconnected features
Knowing when to use supports in 3D printing helps you avoid print failures — and makes post-processing a whole lot easier.
If you’re a beginner at 3D printing, it’s best to start with models that require little to no support. To help you get started, check out our blog featuring the easiest 3D prints and 3D printing ideas for beginners. Most of the models listed in these guides are beginner-friendly, fun to print, and require minimal or no supports.
Types of 3D Printing Supports
There’s more than one way to support a print — and choosing the right type of 3D printing support structure can save you time, material, and post-processing effort. Let’s break down the most common types used in FDM and resin printing.
Lattice Supports
These are the most traditional type: a grid-like structure that forms solid pillars under your overhangs and bridges. They’re widely used because they’re reliable, but they can be bulky, harder to remove, and may leave surface marks where they connect to the model.
Lattice supports are great for:
- Steep overhangs
- Wide bridges
- Strong, rigid parts
But they also use more material and take longer to print.
Tree-Like Supports
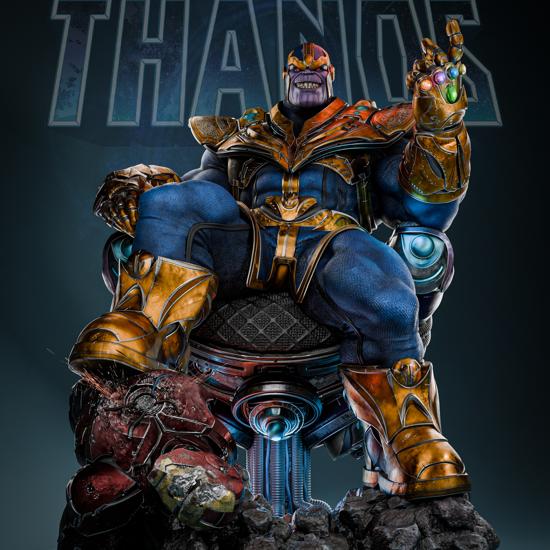
Tree supports in action: stable, detailed, and easy to remove. Thanos 3D model by Zez Studios.
Tree supports look just like they sound — branching upward with minimal contact points. These are popular in resin printing, especially for intricate or delicate models like miniatures. They save material and are easier to remove but aren’t ideal for wide or flat surfaces.
Tree supports are perfect when:
- You’re printing organic shapes
- You want fewer surface blemishes
- You need to reduce cleanup time
Dissolvable Supports
If you’re using a dual-extrusion FDM printer, you can print dissolvable supports using materials like PVA or HIPS. These supports disappear when soaked in water or a solvent, leaving your print smooth and untouched.
While dissolvable supports are more expensive and take time to remove, they’re ideal for:
- Complex internal geometries
- Prints where surface finish is critical
- Prints with hard-to-reach areas
Each type has its pros and cons. Choosing the right one depends on your model, printer, and how much effort you want to put into post-processing.
How to Add Supports to Your 3D Prints
Adding supports might sound technical, but with modern slicing software, it’s pretty straightforward. Most slicers — like Chitubox, PrusaSlicer, or Lychee, — give you both automatic and manual options to place supports.
Automatic Support Generation
When you enable auto supports, your slicer analyzes the model and adds supports wherever it’s needed — usually based on overhang angles and bridge lengths. It’s quick, easy, and ideal for beginners or when you’re short on time.
But here’s the catch: automatic supports often add more than you actually need. That means more printing time, extra material, and more effort when it comes to cleanup.
Manual Support Placement
Manual mode gives you control over where supports go. You can avoid contact with visible surfaces, reduce material use, and make removal easier — especially on models with fine detail.
Manual supports are best if:
- You want to preserve surface quality
- You’re working on high-detail resin prints
- You need to avoid unnecessary cleanup

PV logo indicates Phrozen Verified: Presupported + Highest-Quality 3D models.
One more tip: if you want to skip support setup entirely, consider starting with pre-supported files. For example, Phrozen Verified 3D Models available on Pixup3D.com are expertly designed with supports already in place — making them ready to slice and print without extra prep.

How to Remove Supports from 3D Prints
Once your print is complete, the next step is getting rid of those support structures. And let’s be honest — this is where things can either go smoothly or end in scratches, snapped parts, or a dent in your soul. The goal is to remove supports cleanly, without damaging the surface of your print.
Manual Removal
For FDM prints, most people start with needle-nose pliers, flush cutters, or even their fingers. Grip the support gently and twist or snap it off. Go slowly — rushing can break small features or leave rough marks. If needed, sand the contact points afterward using fine-grit sandpaper (start with 220 and work your way up).
For resin prints, removal can be trickier. Resin supports tend to be more brittle, so snapping them off can sometimes leave pits or scars on the surface. That’s why many pros use ultrasonic cutters, hobby knives, or even hot water baths to soften the resin before removal.
Dissolving Supports
If you used a dissolvable support material — like PVA with FDM — simply soak the model in water (or limonene, depending on your material). It can take a few hours, but the supports will gradually melt away without leaving marks. Just make sure your main print material is compatible with the soaking process.
Support Removal Tips
- Cut, don’t yank — especially with resin
- Soak parts in warm water (or IPA for resin) to soften contact points
- Use wet sanding to clean up scars or blemishes
- For fragile parts, trim supports close to the model and sand the rest
Taking your time with support removal is key to getting clean, professional-looking results — especially on high-detail pieces like miniatures or product prototypes.
3D Printing Without Supports — Is It Possible?
Absolutely. In fact, one of the smartest things you can do as a designer or hobbyist is learn how to reduce or eliminate supports altogether. It saves time, material, and cleanup — and makes your prints look better straight off the bed.
Here’s how to make it happen.
Reorient Your Model
This is the easiest win. Simply changing how your model sits on the build plate can drastically reduce the number of overhangs or bridges that need support. For example, printing a cone upside down might eliminate the need for supports entirely.
Think about:
- Laying models flat instead of upright
- Printing large, flat bases first
- Minimizing “floating” elements by angling the model
Use Self-Supporting Design Elements
Architectural tweaks go a long way. Swap out steep overhangs for chamfers or fillets — gentle slopes that reduce the angle and make it easier for the printer to handle without help. Likewise, designing small bridges with a natural arch or curved base can allow the print to span gaps without drooping.
Split the Model
If your model just can’t be printed support-free in one go, consider slicing it into parts. You can print each section flat or with minimal supports, then glue or assemble them later. It’s a common tactic in both cosplay and miniatures — where avoiding print failure is more important than avoiding seams.
Know Your Tech
Some printers — like SLS or MJF machines — don’t require supports at all. These printers build objects inside a powder bed, which acts as a natural support during the entire process. While they’re not as common for hobbyists due to cost, they’re excellent for production and complex designs.
And even if you’re sticking with FDM or resin, knowing how to optimize your files and printer settings means you’ll rely on supports less often — and your prints will thank you for it.
Design Tips to Minimize Supports
While slicing software does a decent job of adding supports for 3D printing, the real magic happens before you even hit the slicer. Great design can make or break a print — especially when you’re trying to avoid unnecessary support structures.
Here’s how to design smarter from the start.
Use the 45-Degree Rule (to Your Advantage)
This classic rule isn’t just about whether you need supports — it’s also a design guide. If you keep all your overhangs at 45 degrees or less, your model can often print cleanly without scaffolding.
When modeling in CAD or sculpting software, ask yourself: Does this angle really need to be that steep? Slight tweaks can eliminate the need for supports entirely.
Add Chamfers and Fillets
Sharp corners on overhangs are more likely to need support. By replacing a steep angle with a chamfer (an angled cut) or a fillet (a rounded edge), you reduce the overhang angle — which means fewer supports and smoother results.
This is especially helpful in FDM printing, where a sharp edge can droop but a gentle slope can print cleanly.
Bridge Smarter, Not Harder
Bridges — horizontal elements that connect two vertical points — are a common source of frustration. Keep bridges under 5–10 mm if possible. You can also arch them slightly in your design, turning a sag-prone span into a self-supporting curve.
Need a longer span? Consider breaking the model into two parts and printing them separately.
Orient with Intention
Model orientation in your slicer affects everything from strength to surface quality — and especially how many supports are needed. Try positioning your model so:
- The flattest face lies against the build plate
- Overhangs face upward or toward the back
- Details are oriented in a way that avoids support contact
This tiny change can save hours of cleanup later.
Reduce Contact Points
If you do need supports, minimize how and where they touch the model. Most slicers let you control support density, pillar width, and contact point size. Thinner, sparse supports are easier to remove — just make sure they’re still strong enough to do their job.
Conclusion: Supports Should Help You — Not Hurt Your Print
Supports in 3D printing are often seen as a hassle, but they’re actually one of the most powerful tools in your toolkit. Used well, they prevent sagging, stabilize fragile designs, and help you print complex models that would otherwise be impossible.
But the key is balance.
Understanding when to use supports, which support types to choose, and how to optimize your design means fewer print failures, better surfaces, and a smoother post-processing experience. And if you’re using tools like dual extrusion, ultrasonic cutters, or pre-supported models, it gets even easier.
So whether you’re designing from scratch or slicing a downloaded file, remember this: great supports aren’t an afterthought — they’re part of the plan.