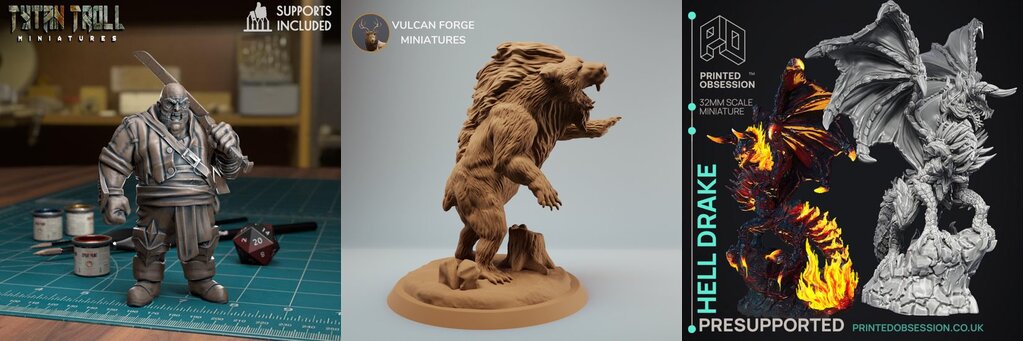
- Pre-supported STLs save time and reduce resin-print failures, but they’re not “universal”—they’re tuned for a specific printer/resin/style.
- Unsupported (raw) STLs give you full control over orientation, support density, and surface quality—great when you know your machine.
- For bottom-up resin printing (MSLA/DLP/SLA), supports aren’t just about overhangs; they also fight peel/separation forces that can rip a print off its tips.
- If you care about flawless visible surfaces, you often want to re-orient and re-support even a pre-supported file to move contact points.
- A smart workflow is: start with pre-supported when available, then verify in preview and adjust supports manually instead of trusting auto-support blindly.
You’ve found an awesome model, you’re ready to print, and then you hit the download button and see two options: pre-supported and unsupported.
Pick wrong and you might waste half a bottle of resin on failures, or spend an hour in Lychee/CHITUBOX building supports you didn’t want to think about tonight.
So which should you download? The practical answer is: it depends on how much control you need, and how closely your setup matches the creator’s setup. Let’s break it down in a way that actually helps you decide before you commit to a long print.
1. What “pre-supported” and “unsupported” STLs really mean
A pre-supported STL (or sometimes a supported scene/plate file) is a model where the creator has already chosen an orientation and added supports (often with a raft). The goal is simple: make it “print-ready,” especially for resin minis and detailed figures.
An unsupported STL is the clean model geometry only—no supports, no raft, no assumptions. You bring it into your slicer, pick the orientation, and create supports yourself.
Why it matters in resin printing: In bottom-up resin printers (the common LCD/MSLA style), supports aren’t optional “nice-to-haves.” They’re a core part of surviving the print process because every new layer has to peel off the FEP film, creating separation/peel forces that can deform thin features or tear the part off weak supports.
Where you’ll see both options: Miniature and statue creators on platforms like Pixup3D, MyMiniFactory, and Cults often provide both. For many hobbyists, that choice is the difference between “print tonight” and “learn supports the hard way.”
2. Why supports are different in bottom-up resin printing (and why pre-supports can help)
If you’ve printed FDM, you might think supports exist mainly to hold up overhangs and bridges. Resin printing adds another enemy: peel force.
In bottom-up SLA/DLP/LCD printing, each layer cures against the film and then must separate. Several factors influence how brutal that separation is—resin viscosity, lift speed, the gap to the film—but a big one is the cross-sectional area of each layer. Larger cross-sections generally mean higher separation forces.
That’s why resin models are often oriented at an angle: not just to handle overhangs, but to reduce cross-sectional area per layer and keep forces manageable.
What pre-supports typically get right:
– A workable orientation that avoids huge “pancake” layers
– Enough support density to keep the model stable through thousands of peel cycles
– Support placement that targets islands and early overhang starts (the spots most likely to fail)
What they can’t guarantee: That their assumptions match your printer (Phrozen, Elegoo, Anycubic, etc.), your resin, your lift speeds, and your tolerance for support marks.
3. When you should choose a pre-supported STL
Pre-supported files shine when your priority is success rate and time saved.
Best for:
– Your first resin printer (or first month with it)
– Small to medium miniatures with lots of tiny overhangs
– Prints where you’d rather sand/fill a few support marks than risk a failure
– Busy nights when “good enough and finished” beats “perfect but not printed”
A big beginner failure in bottom-up resin printing is finishing with only supports on the build plate—the model breaks away mid-print because the peel forces become higher than what the support tips can hold. Pre-supported files often reduce this risk by using sturdier tips and more supports where needed.
Support tip tradeoff (the part creators juggle for you):
– Smaller tips (around 0.2–0.3 mm) remove easier and leave lighter marks, but they’re weaker.
– Thicker tips (around 0.4–0.5 mm) hold better against peel forces, but they leave more visible scars.
Many creators lean toward reliability—especially for heavier pieces—because a few marks are easier to fix than a failed print.
Quick sanity check before printing a pre-supported file:
1. Open it in your slicer and run a layer preview.
2. Look for islands/suspendings (floating pixels that appear before they connect).
3. Confirm the supports actually touch those early features.
Even good pre-supports deserve a 2-minute preview.
4. When you should choose an unsupported STL
Unsupported STLs are the right choice when you care about control—surface finish, support scarring, orientation strategy, and printer-specific tuning.
Best for:
– Display pieces where the “front” must be pristine
– Models you want to hollow, add drain holes to, or split into parts
– Printing on a different scale than the creator intended
– Dialed-in users who know their slicer and printer behavior
Surface-quality reality: Resin supports leave marks. If the model has a complex, highly visible surface (faces, armor plates, smooth cloth folds), you often want to orient it so supports land on hidden areas. Guides for resin supports consistently emphasize avoiding supports on forward-facing/hero surfaces whenever possible, using orientation to protect the areas you’ll stare at.
Orientation is your strongest tool: In bottom-up resin printing, you’re balancing:
– Minimizing cross-sectional area per layer (to reduce peel force)
– Ensuring overhangs/bridges don’t print in mid-air
– Keeping support contact points off your most visible surfaces
Pre-supported files pick one compromise. Unsupported lets you pick yours.
5. The hidden catch: pre-supported doesn’t mean “perfect for your setup”
Pre-supported files are usually built around a particular workflow: a slicer, a printer class, a resin type, and print settings (especially lift speed). Change any of those and the “perfect” support job can become merely “okay,” or occasionally unreliable.
Common mismatch scenarios:
– Different resin rigidity: Softer resins can flex more under peel forces, stressing thin supports.
– Aggressive lift speeds (“vroom” style): Faster lifting increases the demands on support strength.
– Different printer behavior: Z-axis stability, light intensity, and vat/film condition affect bridging and peel performance.
– Scaling the model up: Heavier prints need thicker/denser supports; scaling up without changing supports is asking for trouble.
This is why experienced users often treat pre-supported as a starting point, not gospel.
6. How to decide in 30 seconds (a practical checklist)
If you’re standing at the download page, use this:
Download pre-supported if:
– You’re new to resin printing
– The model is a mini with lots of thin bits (weapons, fingers, horns)
– You want the fastest route to a successful print
– You’re printing at the creator’s intended scale
Download unsupported if:
– You’re printing a centerpiece and care about the “front” surface
– You plan to change scale significantly
– You need to hollow/split/customize
– You already have a support style that works reliably on your machine
Download both if available:
– You want a safety net
– You’re not sure which route will be faster overall
Storage is cheap. Failed prints aren’t.
7. What to check if you print the pre-supported version
Even if you stick with the supported file, you can still improve your odds.
Preview for islands and suspendings: In slicer preview, watch for areas that appear “in mid-air” before connecting to the rest of the model. Those spots need support. If you see floating sections without support contact, add a few manual supports.
Look for uneven support distribution: Evenly distributed supports help the print resist the tug-of-war between the build plate and the film. If one side is heavily supported and the opposite side is sparse, you can get warping, deformation, or localized failures.
Check contact points on important surfaces: If the creator supported the face of a character or the front of a shield, you may want to rotate and re-support using the unsupported STL (or edit the supported setup) so the scars land somewhere hidden.
8. What to do if you choose the unsupported STL (without overcomplicating it)
Unsupported doesn’t have to mean “support hell.” A simple, repeatable approach works.
Start with orientation:
– Angle the model to reduce cross-sectional area per layer.
– Avoid big flat areas parallel to the build plate.
– Protect the “hero” surfaces by pointing them away from supports.
Then support the right things:
– Overhangs and bridges: Steeper overhangs need support. As a rough guideline, overhangs less than ~45° from vertical are often more manageable, while near-horizontal features usually need support.
– Long bridges: Short bridges can sometimes print without supports, but longer spans risk layer breakage or layer separation, depending on printer performance and resin stiffness.
– Weak structures: Thin parts might technically print, but they can deform or snap under peel forces unless stabilized.
Don’t trust auto-support alone: Auto-support is a great starting point, but it’s not a final answer. The reliable workflow is auto-support → preview → manual fixes.
Choose tip size with intent: If you’re chasing success rate, thicker tips and higher density tend to be safer. If you’re chasing minimal scarring, use lighter tips on visible areas and reserve heavy supports for hidden zones.
9. Resin vs FDM note: this question is mostly a resin problem
“Pre-supported vs unsupported STL” is most common in resin communities because resin printing almost always requires supports and the consequences of weak supports are dramatic.
For FDM, supports are still important, but you typically generate them in the slicer for your printer, your nozzle, your cooling, and your preferred support style (traditional vs tree/organic). FDM supports also cost time and material, and they’re sacrificial by nature—so you still want to use them efficiently.
If you’re printing figures on FDM, you’ll generally download the normal STL and handle supports in Cura/PrusaSlicer/OrcaSlicer. For resin minis, pre-supported files are a much bigger deal.
10. Where to get good pre-supported files (and what “good” looks like)
A well-supported file usually shows:
– Consistent, intentional orientation
– Supports that actually start under islands
– Enough density to stabilize delicate features
– Contact points placed on less-visible areas when possible
If you want a curated starting point, here’s a direct list: The 15 Best Pre-Supported 3D Models for Flawless Printing
You’ll find supported and unsupported options across Pixup3D and other marketplaces, but the real “quality signal” is whether the creator understands peel forces, support tip strength, and contact point placement—not just whether they clicked auto-support.
Common Mistakes
Downloading pre-supported and printing without previewing
Pre-supported files can still miss an island, especially after scaling or if the slicer interprets something slightly differently. A quick layer preview catches the classic “floating pixels” problem before it becomes a vat cleanup.
If you only do one thing: scrub through the first third of the print in preview and look for any feature that appears before it’s supported or connected.
Assuming lighter supports are always better
It’s tempting to chase tiny support tips because they leave smaller marks. But bottom-up resin printing puts high stress on supports during the peel motion, and if the peel forces exceed what the tips can hold, the model tears off and you get the dreaded “supports only” failure.
A smarter approach is mixed supports: heavier where strength matters, lighter where cosmetics matter.
Trusting auto-support as a final answer
Auto-support tools are useful, but they’re not perfect. They can miss islands, under-support long bridges, or place supports on your most visible surfaces.
Use auto-support to get 80% of the way, then manually fix the last 20% by checking preview and moving contact points to less critical areas.
FAQ
Should I always download both pre-supported and unsupported?
If both are available, yes—especially for resin. The pre-supported version is a fast baseline, and the unsupported version gives you an escape route if you dislike support placement or want a different orientation.
Are pre-supported files guaranteed to work on my printer?
No. They’re optimized for the creator’s assumptions: printer behavior, resin type, lift speeds, and model scale. They often work well, but they’re not universal.
Why do resin prints need so many supports compared to FDM?
Bottom-up resin printing adds peel/separation forces every layer as the cured resin detaches from the film. Supports aren’t only holding up overhangs—they’re stabilizing the model against repeated mechanical stress.
If I want the best surface finish, should I avoid pre-supported?
Not automatically, but you should inspect where the contact points land. If supports touch the most visible areas, you’ll likely get a better result by re-orienting and re-supporting from the unsupported STL.
What’s the easiest way to spot missing supports?
Use your slicer’s layer preview and look for islands/suspendings—areas that appear before they connect to the rest of the model. Those need support contact.
How do I choose support tip size?
Smaller tips remove easier and leave smaller marks but are weaker. Thicker tips hold better against peel forces but leave more visible scars. Many reliable setups use thicker tips for primary load-bearing supports and lighter tips for delicate details.
Does scaling a pre-supported model cause problems?
It can. Scaling up increases weight and peel load, which can overwhelm supports that were fine at the original size. If you scale significantly, expect to redo supports (or at least reinforce them).
Sources
- A Complete Guide About Adding Supports in SLA/DLP/LCD 3D …
- Stop 3D Printing Failures With All3DP's Ultimate Guide to Support Structures | All3DP
- Supports for 3D Printing: Everything You Need to Know – Phrozen
- 6 Key Principles of resin 3D Printing Supports that Work – AmeraLabs
- Creating custom support structures with CAD | 3D Printing – Airwolf 3D
- Support material complete guide for 3D printing – YouTube
- Pre-Supported vs unsupported STL files – What's the difference?
- Pre-Supported vs. Raw STLs: Why You Must Choose Print-Ready …
- The 15 Best Pre-Supported 3D Models for Flawless Printing – Pixup 3D
- 3D Printing Supports: When, Why, and How to Use Them for Perfect …
Ready to put these ideas into practice? Browse 3D printable models on Pixup3D and find your next print!
If you're looking to get started with Pre-Supported vs Unsupported STL: Which Should You Download?, here are some 3D printable models on Pixup3D that might inspire your next project:
![Bandle Boss [Pre-Supported]](https://file.pixup3d.com/uploads/post_img/file/72512/x3_Bandit%20Boss.jpg)
.png)


.png)