
You’ve spent hours designing, slicing, and printing a perfect 3D model—but when it comes off the print bed, it’s not quite ready for the spotlight. Whether you’re working with filament-based (FDM) or resin 3D printers, cleaning and post-processing are essential steps to transform rough parts into polished, professional-quality components.
From removing stubborn supports to smoothing layer lines, a well-finished print not only looks better but often functions better, especially in assemblies or visual presentations. Fortunately, cleaning your 3D prints doesn’t require expensive equipment—just the right tools, materials, and techniques.
In this guide, we’ll walk through the essential methods for cleaning FDM and resin 3D prints, highlight common mistakes, and share pro tips used by experienced makers. Whether you’re a hobbyist, product designer, or prototyping engineer, this is your complete manual for turning raw prints into refined results.
Removing FDM Supports Like a Pro
One of the first steps after an FDM print finishes is removing the support material. While this might seem like a straightforward task, doing it the wrong way can damage your model or leave deep scars that require extra smoothing later.
If you want to learn more about 3D printing supports—such as when and where to add them, how to remove them, and more—be sure to check out our detailed blog on 3D printing supports. It’s a must-read, especially if you’re a fan of printing large models that require extensive support structures.
On the other hand, if you prefer printing 3D models that are already pre-supported by our expert designers, explore our collection of Phrozen Verified 3D models and read our blog on the best pre-supported 3D models.
Start with your hands—gently twist and pull off any large, easily removable supports. For tighter areas, switch to needle-nose pliers or flush cutters. Always clip close to the base of the support, not the model itself, to reduce the risk of gouging the print.
For especially stubborn supports or tricky geometries, heat can be your ally. Warming the support material slightly with a hairdryer or heat gun softens it just enough to make it pliable. Be cautious not to overheat, as this can warp the surrounding structure.
Some makers also score supports with an X-Acto knife to guide cleaner breaks, especially on high-detail models. However, knives should be used with care and precision—one slip can ruin hours of printing.
Pro Tip: If your supports seem overly fused to the model or are hard to break off, you may want to adjust your slicer settings. Lowering interface layer density or increasing Z-distance between support and model often results in easier removals.
Washing Resin 3D Prints Safely and Effectively
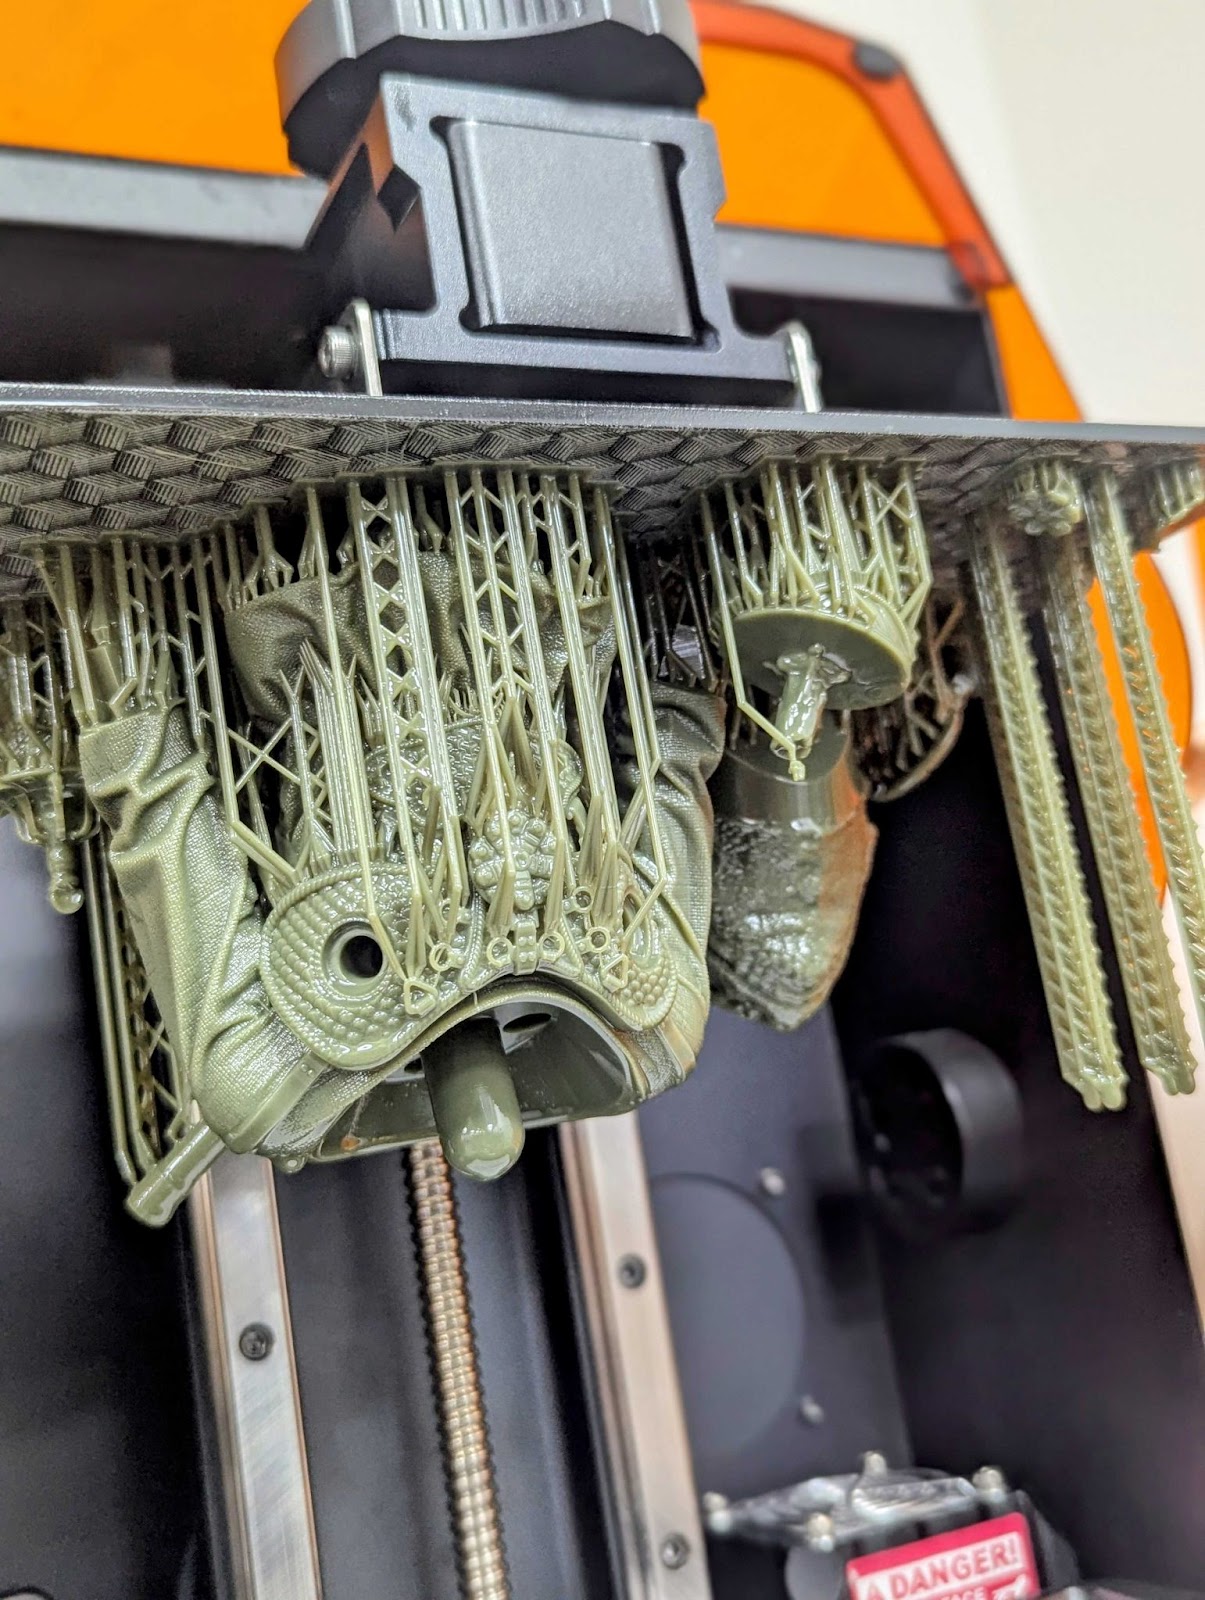
If you’ve ever handled a freshly printed resin model, you know how critical washing is. Right out of the printer, resin prints are coated in uncured, sticky material that not only affects detail but can also be toxic if left on the surface. Cleaning removes this residue and preps the model for curing and painting.
There are two main approaches: the dunk-and-wash method and using a dedicated wash station.
For dunk-and-wash, simply fill two containers with 95% isopropyl alcohol (IPA) or Phrozen Wash. Rinse the print in the first container, then again in the second to remove lingering resin. Gently swirl or agitate the print, and use a soft brush for tight details—just avoid using rough brushes like toothbrushes, which can scratch the surface.
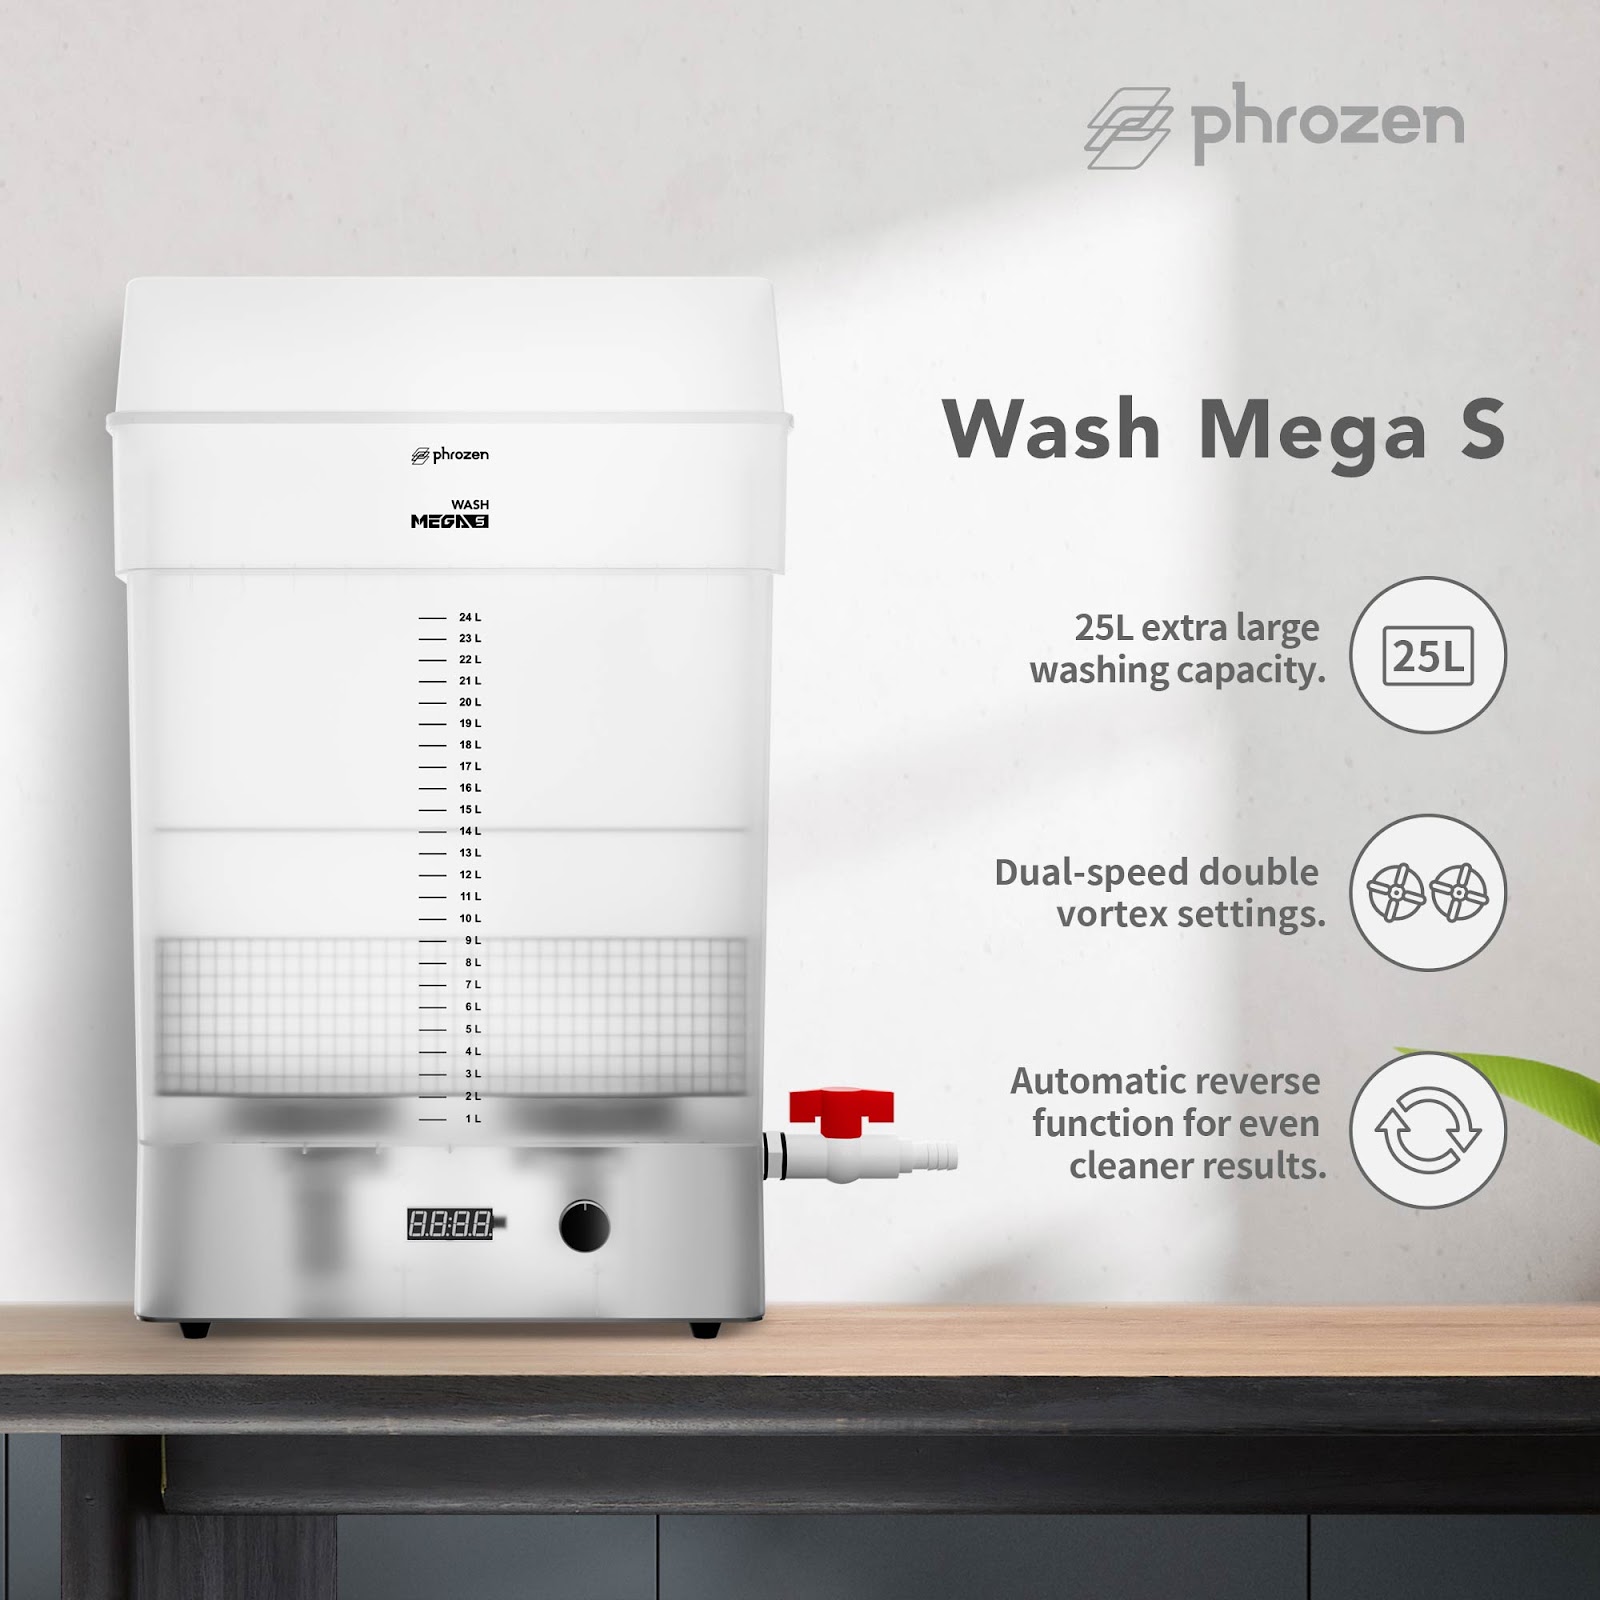
If you’re looking for a cleaner, more consistent process, consider a wash machine like the Phrozen Wash Mega S or Wash & Cure Kit. These automate agitation and rinsing, keeping hands free and mess to a minimum. Set the wash timer between 30 seconds to 3 minutes depending on the model’s size and intricacy.
Pro Tip: Don’t over-soak. Prolonged exposure to alcohol can weaken fine parts or make them brittle. Always dry prints in a shaded area or use compressed air for faster results before curing.
Sanding Techniques for Smoother Surfaces
Sanding is the classic go-to for eliminating layer lines, zits, blobs, and rough edges. Done right, it can transform a functional print into something that feels almost injection-molded. But it’s all about technique and patience.
Start with coarse sandpaper—around 150 to 220 grit—to tackle big imperfections or leftover support scars. Then progress gradually to finer grits like 400, 600, and eventually 1000+ for a buttery-smooth finish. Always sand in small, circular motions, moving across and against the grain for uniform coverage.
For delicate surfaces or fine models (especially PLA or resin), wet sanding is your best friend. It reduces heat buildup, minimizes scratches, and makes the whole process cleaner. Just dip your sandpaper in water and lightly scrub the model’s surface.
When sanding small features or tight areas, switch to micro files or foam sanding sticks. Rotary tools can be effective too, but use low speeds to avoid melting or scarring soft materials like PLA.
Pro Tip: After sanding, give your model a quick rinse or wipe to remove dust and sanding debris. Follow up with a light coat of mineral oil to restore color and add a slight gloss to pigmented prints.
Polishing and Glossing Methods
After sanding, polishing adds a whole new level of shine and smoothness. It’s not just about appearance—polishing helps eliminate micro-scratches, enhances color depth, and gives parts a finished, professional feel. Whether you’re polishing a cosplay prop, a product prototype, or a display model, this step makes a big difference.
To begin, make sure your part has been sanded to at least 1000-grit for best adhesion and results. Apply a small amount of liquid metal polish—like Brasso or a plastic-safe equivalent—onto a soft microfiber cloth. Gently buff the model in circular motions, covering all surfaces. The goal isn’t to soak the part but to evenly distribute the polish and work it into the surface.
For larger items or more stubborn surfaces, a polishing bit on a rotary tool can accelerate the process. Use low speed and light pressure to avoid melting the plastic. After polishing, use a clean cloth to buff the surface dry, revealing a mirror-like sheen.
Pro Tip: For printed parts with vibrant color but dull finishes, a quick coat of mineral oil or even clear shoe polish can revive vibrancy and offer a protective layer.
Vapor Smoothing & Chemical Finishing
If you’re working with materials like ABS, ASA, or certain specialized filaments, vapor smoothing is an advanced method that delivers injection-molded smoothness with minimal effort. The process softens the outer surface of the print just enough to melt the layer lines into a glassy, seamless finish.
The most common method involves acetone vapor smoothing for ABS. You’ll need a sealed container, paper towels soaked in acetone, and a metal or glass base to suspend your print. Once inside, the vapors gently dissolve the print’s surface over 10–20 minutes. Be sure to monitor closely—too long, and your details may vanish.
If you’re not comfortable building a DIY smoothing chamber, commercial polishers like the Polymaker Polysher offer safer, user-friendly solutions for smoothing materials like PolySmooth filament.
Important Safety Notes: Always vapor smooth in a well-ventilated space, away from flames or sparks. Acetone is extremely flammable, and its fumes are hazardous. Use gloves, goggles, and a respirator when handling chemicals.
For resin prints, chemical finishes typically involve isopropyl alcohol (IPA) rinses during the washing process, followed by UV curing. However, you can also apply a clear acrylic spray coat after sanding to enhance gloss and protect the surface from yellowing.
Pro Tip: A thin coat of epoxy resin brushed onto a sanded PLA part can replicate the look of a polished resin cast—perfect for cosplay or artistic prints needing that “finished” look.
Cleaning Your 3D Printer for Better Prints
Post-processing isn’t just about improving the part—it starts with how well your printer is maintained. A clean machine ensures cleaner, more reliable outputs and minimizes post-processing struggles in the first place.
For FDM printers, start with the print bed. Depending on the surface (PEI, glass, textured steel), use the right cleaning method. For PEI sheets and smooth glass, isopropyl alcohol (IPA) works well. If there’s glue residue or filament buildup, gently scrape with a plastic putty knife or use warm, soapy water for a deeper clean. Avoid metal scrapers unless absolutely necessary—they can scratch and degrade the bed’s surface.
The nozzle also plays a crucial role. Before each print, ensure filament flows cleanly. Remove any filament “ooze” or burnt bits with a brass wire brush. For partial clogs, try a cold pull method using nylon filament to clean out debris. For more stubborn blockages, consider removing and soaking the nozzle in acetone or replacing it altogether.
For resin printers, maintenance is even more critical. After every print, inspect and clean the FEP film at the bottom of your vat. Carefully remove any cured resin bits using a plastic scraper—never metal. If the film is scratched or foggy, it’s time for a replacement.
Also, clean the resin vat and build plate thoroughly with IPA. Avoid letting alcohol sit too long on rubber seals or LCD surfaces. If your printer includes mirrors or lenses, wipe them only with manufacturer-approved optical wipes to prevent damage.
3D printers can be quite an investment, so you’ll want to make sure they last a long time. That’s why it’s important to adopt the best practices to keep them in tip-top condition. For that, be sure to check out our blog on How to Maintain a 3D Printer. It covers all the do’s and don’ts to ensure your printer stays in optimal shape.
Pro Tip: A clean printer doesn’t just produce better prints—it extends the life of your machine. Set a maintenance schedule for every 5–10 prints, and you’ll save time (and materials) down the line.
Conclusion: Master the Finish, Master the Craft
Cleaning your 3D prints isn’t just about aesthetics—it’s about taking pride in your work. From removing supports and washing resin parts, to sanding and polishing or mastering vapor smoothing, every step adds value to the final product. What begins as a rough print becomes something display-worthy, functional, and refined with the right tools and patience.
Whether you’re working on a cosplay piece, a precision prototype, or just a favorite figurine, post-processing is the bridge between an idea and a professional-quality result. And when you pair the right techniques with high-performance machines like those from Phrozen, your prints don’t just look finished—they feel next-level.
So next time you lift a model off the bed, remember: the real magic happens after the print ends. Clean, sand, polish, and enjoy the satisfaction of bringing your creations to life—one step at a time.