
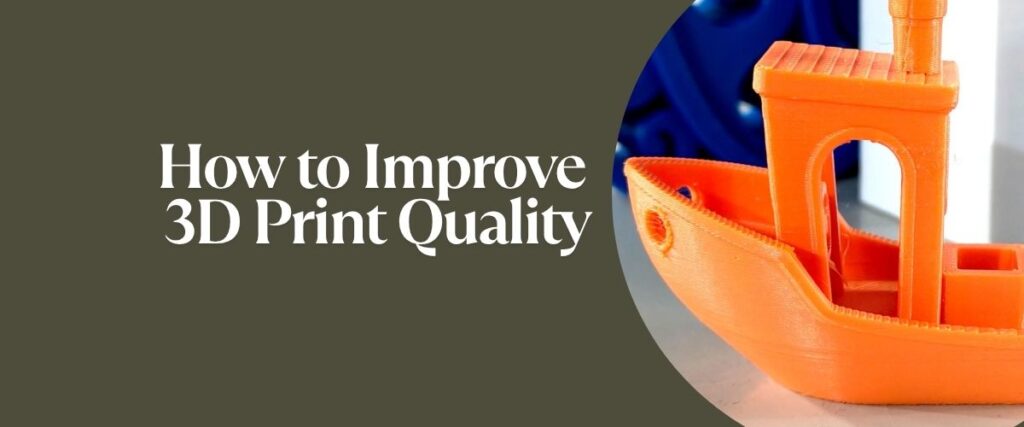
Whether you’re printing a tabletop miniature or a functional prototype, the quality of your 3D print can make or break your final result. Rough surfaces, poor layer adhesion, warping, or faded details are common issues that frustrate makers of all experience levels. Thankfully, these problems are not only avoidable—they’re also fixable with the right approach.
This guide will walk you through how to improve 3D print quality, whether you’re using FDM or resin printers. From understanding the basics of print quality to mastering slicer settings and choosing better materials, we’ll break down every step of the process in plain, practical language.
No matter if you’re after smoother surfaces, sharper details, or better first-layer adhesion, the advice here will help you achieve more consistent, high-quality 3D printing results. Along the way, we’ll also explore a few techniques that seasoned pros use—like working with verified, professionally supported models that are already tuned for success.
Let’s start with the fundamentals: what defines great print quality, and how do you recognize when something’s wrong?
What Defines High-Quality 3D Printing?
3D printing quality is usually measured by how accurate, detailed, and smooth your final print looks and feels—compared to the digital model. For both FDM (Fused Deposition Modeling) and resin printing, quality depends on how well each layer adheres, aligns, and cures. Poor prints can show rough textures, visible ridges, shifting layers, or weak structural parts.
There are a lot of differences between FDM and resin 3D printing, and if you’re a beginner, it’s crucial to understand them thoroughly. To help you make an informed decision, check out our detailed blog on resin vs. filament 3D printing. It covers everything from print quality and material types to cost, ease of use, maintenance, and ideal applications for each method.
In FDM printing, quality issues often appear as stringing, gaps between walls, or uneven layer lines. These result from problems like bad bed leveling, clogged nozzles, or improper slicer settings. You might also see warping or elephant foot effects if your temperature settings are off or the cooling fan is overactive too early.
Resin printing, on the other hand, tends to struggle with things like failed supports, over-cured layers, and surface artifacts due to incorrect exposure time. Sometimes, models fail entirely if they detach from the build plate mid-print. The result can be a half-formed blob or a model with sagging, distorted edges. In extreme cases, poor resin surface quality can lead to textures that are sticky, soft, or filled with uncured patches.
A high-quality print should show:
- Smooth surface transitions
- Clear, sharp details
- Consistent wall thickness
- Accurate dimensions
- Proper adhesion to the plate or raft
Knowing how to spot 3D printing quality issues early makes it easier to troubleshoot and adjust your process. Next, let’s dig into the practical steps you can take to raise your print quality from average to excellent.
Choose a High-Quality 3D Printer for Better Results
It’s hard to get consistently good results from a machine that isn’t built for precision. The quality of your 3D printer directly affects how well it can maintain layer alignment, control movement, and manage print temperature—all of which are crucial for creating clean, accurate models.
For FDM printers, a sturdy frame reduces vibration and ensures smoother motion across all axes. Dual Z-axis support is particularly helpful for tall prints, as it prevents wobbling. Look for a reliable extruder with consistent flow, a heated bed with even temperature distribution, and a well-supported build plate that can stay level throughout a print.
In resin printers, print quality depends heavily on the resolution of the LCD screen and the accuracy of the Z-axis motor. Higher-resolution LCDs—like 8K monochrome displays—allow for much finer detail reproduction. A rigid structure and stable lifting mechanism help prevent layer shifting and uneven curing.
Regardless of technology, a high quality 3D printer doesn’t need to be the most expensive. What matters most is its ability to maintain mechanical consistency, use reliable firmware, and support fine-tuning of exposure or flow settings.
Trying to find the right 3D printer for your needs can be confusing, and there’s a lot to consider. If you’re in the same situation, check out our insightful blog on the 3D printer buying guide. Whether you’re deciding between an FDM or resin 3D printer, evaluating build plate size, print speed, connectivity options, or other features — this guide will help you make the right choice.
Dial in the Right Layer Height
Layer height refers to how thick each individual layer of your print will be. It plays a major role in the final appearance and precision of your object. In general, smaller layer heights give you smoother surfaces and more refined detail. However, they also make prints take longer to complete.
For FDM printing, a common default layer height is 0.2 mm. If you’re printing something that needs visual polish—like a figurine or display model—you might lower that to 0.1 mm. On the other hand, for rough prototypes or large parts where speed is more important than detail, 0.3 mm or higher might be acceptable.
In resin printing, the standard layer height is often around 50 microns (0.05 mm), which balances detail and speed well. If you’re printing miniatures or intricate jewelry, you may drop to 25 microns to capture finer details. But keep in mind, decreasing the resin layer height increases print time significantly and may require fine-tuning your exposure settings.
You should also make sure your layer height matches your nozzle or pixel resolution. For FDM, layer height should be around 75% or less of your nozzle diameter. For resin, it should correspond to your printer’s minimum supported step distance.
One of the best ways to experiment safely is by using verified print models that were designed with ideal settings already in mind. These models often come pre-tuned for specific resin printer layer height and exposure parameters, making them more likely to succeed even on your first try.
Optimize Exposure Settings for Plate Adhesion
If you’re working with a resin 3D printer, getting the exposure settings right is essential—especially during the first few layers. When the model doesn’t stick to the build plate, the print often fails early, leading to wasted resin and a messy cleanup. This is why plate adhesion depends so much on correctly tuned exposure time.
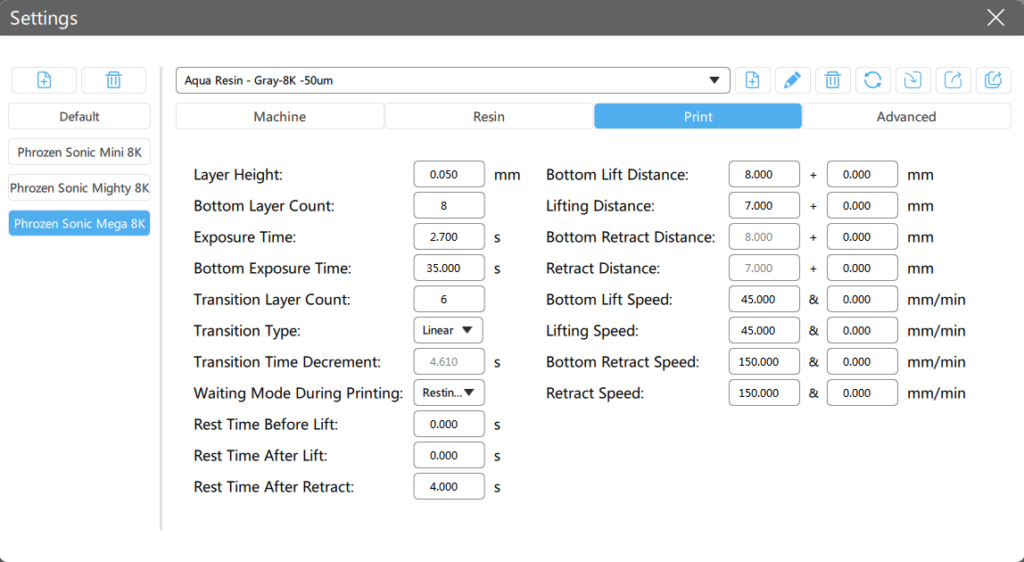
Most slicer software divides exposure into two categories: bottom layer exposure and normal exposure. The bottom layers (often 4–8) require longer exposure to bond the resin firmly to the plate. However, if your normal exposure is too low after those first few layers, the rest of the model might not cure properly and detach.
So, should normal exposure be higher for resin build plate adhesion? Not necessarily. It’s the bottom exposure that does the heavy lifting here. Instead, focus on optimizing both values based on your resin type and layer height. For example, thicker layers require slightly longer exposures, while transparent or light-colored resins may cure faster and need less time.
Always refer to your resin manufacturer’s recommended settings. If you’re using Phrozen resins, you can check our official resin profiles for the best exposure times tailored to each product. For even more reliable results, printing with Phrozen Verified 3D Models can help you skip the trial-and-error process entirely. These models are already tested with ideal support placement and exposure parameters—making successful adhesion far more likely.
Keep Materials Dry and Stable
One of the most overlooked causes of poor print quality is moisture in your materials. Both filament and resin are sensitive to environmental humidity, and even a small amount of absorbed water can create major problems during printing.
For FDM filament, moisture causes stringing, popping noises, inconsistent extrusion, and weaker layer bonding. You may also notice bubbles or rough surfaces where the steam escapes during extrusion. PLA, PETG, ABS, and especially Nylon are all affected to different degrees. If your prints look unusually fuzzy or brittle, there’s a good chance your filament is too damp.
Resin is also vulnerable. When exposed to air for too long, it can start to degrade or absorb water, which affects how it cures. The result may be cloudy or tacky surfaces, under-cured sections, or poor resin surface quality overall.
To avoid these issues, store your filament in airtight containers with desiccant packets. You can also use filament dryers or dry boxes to restore material quality before printing. Resin bottles should be kept sealed when not in use and stored away from direct light and temperature fluctuations. If you’ve poured resin into your vat but won’t be printing right away, it’s best to return it to the bottle and strain it for reuse later.
Fine-Tune Your Slicer Settings
Your slicer is where the digital model becomes a physical print, and it has a powerful influence on everything from detail resolution to structural strength. Poor slicer settings are one of the leading causes of quality issues like under-extrusion, gaps, messy overhangs, and inconsistent surfaces. Fortunately, they’re also among the easiest to correct.
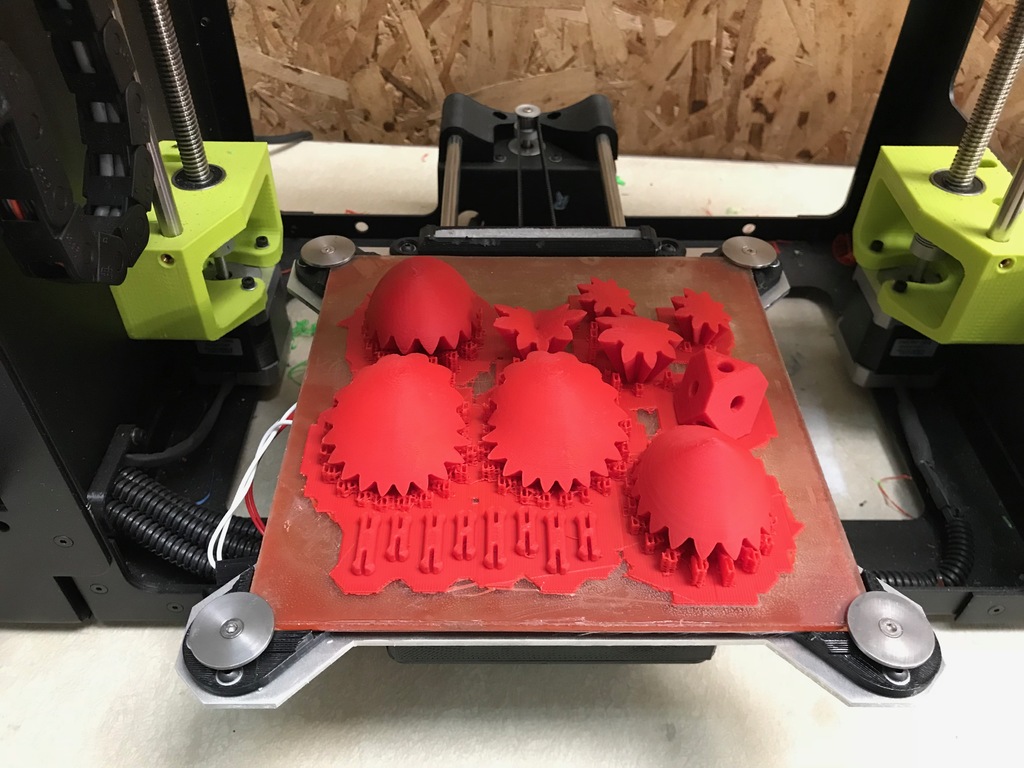
Start by adjusting layer height and print speed for your material and model type. If you’re working with a delicate resin miniature, for instance, slower print speeds and thinner layers (like 50 microns) will give a smoother result. On the other hand, a mechanical bracket printed in PLA might allow for thicker layers and faster speeds.
Pay close attention to wall thickness, infill density, and retraction settings. These affect your print’s visual sharpness and internal strength. For FDM printers, proper retraction distance and speed help reduce stringing and blobs between features. Resin printers don’t use retraction in the same way, but benefit from features like anti-aliasing, lift speed adjustments, and bottom layer count to fine-tune quality.
If your prints are showing ringing artifacts or slight shifting between layers, try reducing acceleration and jerk values in the slicer. These settings control how abruptly your printer moves, and smoothing them out can significantly improve surface appearance.
Above all, remember that small, gradual changes yield the best results. When troubleshooting a quality issue, adjust only one or two parameters at a time. Then reprint the same model to isolate what made a difference.
Level the Bed and Calibrate the Z-Axis Properly
Even if your slicer settings are perfect, a misaligned build plate or improperly set Z-offset can still ruin your print. Good bed leveling is foundational for both FDM and resin printing because it ensures consistent layer adhesion from the very first layer onward.
In FDM printers, the nozzle should be just close enough to lightly press the filament into the build surface without scraping it. Too far, and your print won’t stick. Too close, and the filament will squish unevenly or clog the nozzle. Manual leveling with a piece of paper or feeler gauge works for most printers, but auto-leveling sensors can save time and increase reliability—if calibrated correctly.
For resin printers, “bed leveling” means ensuring the build plate is parallel to the bottom of the vat and properly tightened. Even a slight tilt can cause the print to detach or fail to build evenly. Before printing, re-level your plate by loosening the screws, lowering the plate until it contacts the vat film evenly, and then tightening everything with slight downward pressure.
Don’t overlook your Z-axis calibration, either. On both printer types, incorrect Z-offset values can lead to adhesion issues or distorted lower layers. Resin printers may also suffer from “elephant foot,” where the base of the print is over-cured and bloated due to too low of a lift height or incorrect timing.
Regular calibration not only improves your 3D printer quality, but also helps you avoid the most common causes of failure before the first layer is even done. Many experienced users recheck their leveling every few prints, especially after removing a large object or changing the build surface.
Use Clean, Supported, Well-Oriented Models
The quality of your model before printing is just as important as the printer or material itself. A poorly designed or unoptimized 3D file—especially one downloaded from an unknown source—can lead to frustrating failures no matter how good your settings are.
Start by ensuring the model is manifold, meaning it’s a closed mesh with no holes or non-printable geometry. You can use free tools like Meshmixer or Netfabb to analyze and repair files. Unsupported overhangs, intersecting walls, and excessive internal geometry can all cause slicing problems and physical printing issues.
Equally important is proper model orientation. How a model sits on the build plate affects not only its strength and appearance, but also the amount and effectiveness of supports. In FDM printing, orienting flat surfaces parallel to the bed often results in cleaner lines and easier adhesion. In resin printing, it’s best to angle the model to reduce cross-sectional area per layer, which minimizes suction force and improves print success.
Support placement is another crucial factor—especially in resin printing, where incorrect support density or location can result in floating or detached parts. While slicers often have automatic support generators, they’re not always ideal, especially for complex or delicate structures. If supports aren’t placed correctly, your 3D model might not print successfully—or form at all.
On the other hand, many users rely on pre-supported models created by experienced designers. These are typically optimized for reliable printing, with strategically placed contact points that minimize scarring while maintaining stability throughout the process.
Phrozen offers a growing library of Verified 3D Models, which are tested in-house by expert designers and validated for support strength, orientation, and printability. Starting with one of these files helps reduce print failure risks and gives you a clearer benchmark for what “good” looks like—particularly helpful if you’re troubleshooting other parts of your workflow.
Upgrade to Better Materials for High Detail
Even with perfect calibration and a solid model, your final results will still be limited by the material you use. Choosing higher-quality filament or resin can drastically improve print detail, finish, and strength.
In FDM printing, filaments with tight diameter tolerances and consistent melt characteristics are far less likely to cause clogs, jams, or uneven extrusion. Premium PLA, PETG, and ABS options offer smoother finishes and better mechanical reliability. Cheaper materials, while tempting, can include impurities or inconsistent blends that lead to brittle layers and unreliable flow.
For resin printers, the formulation of the resin directly affects surface quality, curing precision, and overall resolution. Low-viscosity resins like Phrozen’s Aqua 8K are ideal for capturing fine details, while tougher resins or engineering-grade options are better suited for functional parts. Castable and dental resins also offer highly specialized performance—though they require tighter exposure calibration to avoid defects.
Ambient conditions matter too. Resins perform best at stable room temperatures, typically between 20–25°C (68–77°F). Storing your resin away from light and sealing it properly between uses helps preserve its chemical stability and ensures predictable curing behavior.
With so many types of resins available, it can be challenging to figure out which one is best for your project. To make the decision easier, check out our insightful blog on the resin buying guide. And if you’re more focused on FDM 3D printing, don’t miss our curated list of the top filament brands to help you choose the best materials for your prints.
Inspect for Print Failures Early
One of the best habits you can develop as a 3D printing enthusiast or professional is to inspect your prints early and often. Many print failures—especially those related to poor adhesion, skipped layers, or malformed geometry—start in the first few millimeters of the build. By catching these signs early, you can save hours of wasted time and material.
For FDM printers, watch the first few layers as they’re laid down. If the filament isn’t sticking evenly or the extruder is dragging through already-placed material, you likely have a problem with bed leveling or Z-offset. Warping at the corners, thin or missing lines, and irregular extrusion all point to issues that need to be addressed before continuing.
In resin printing, early inspection is a bit trickier since the model emerges slowly from the vat. However, some signs of trouble are still detectable. If you see a “pancake” of cured resin stuck to the FEP film after a failed job, that’s a clear indicator of plate adhesion failure or incorrect exposure settings. You can also gently pause a print mid-process and raise the plate to visually inspect whether supports are forming properly and attached to the base.
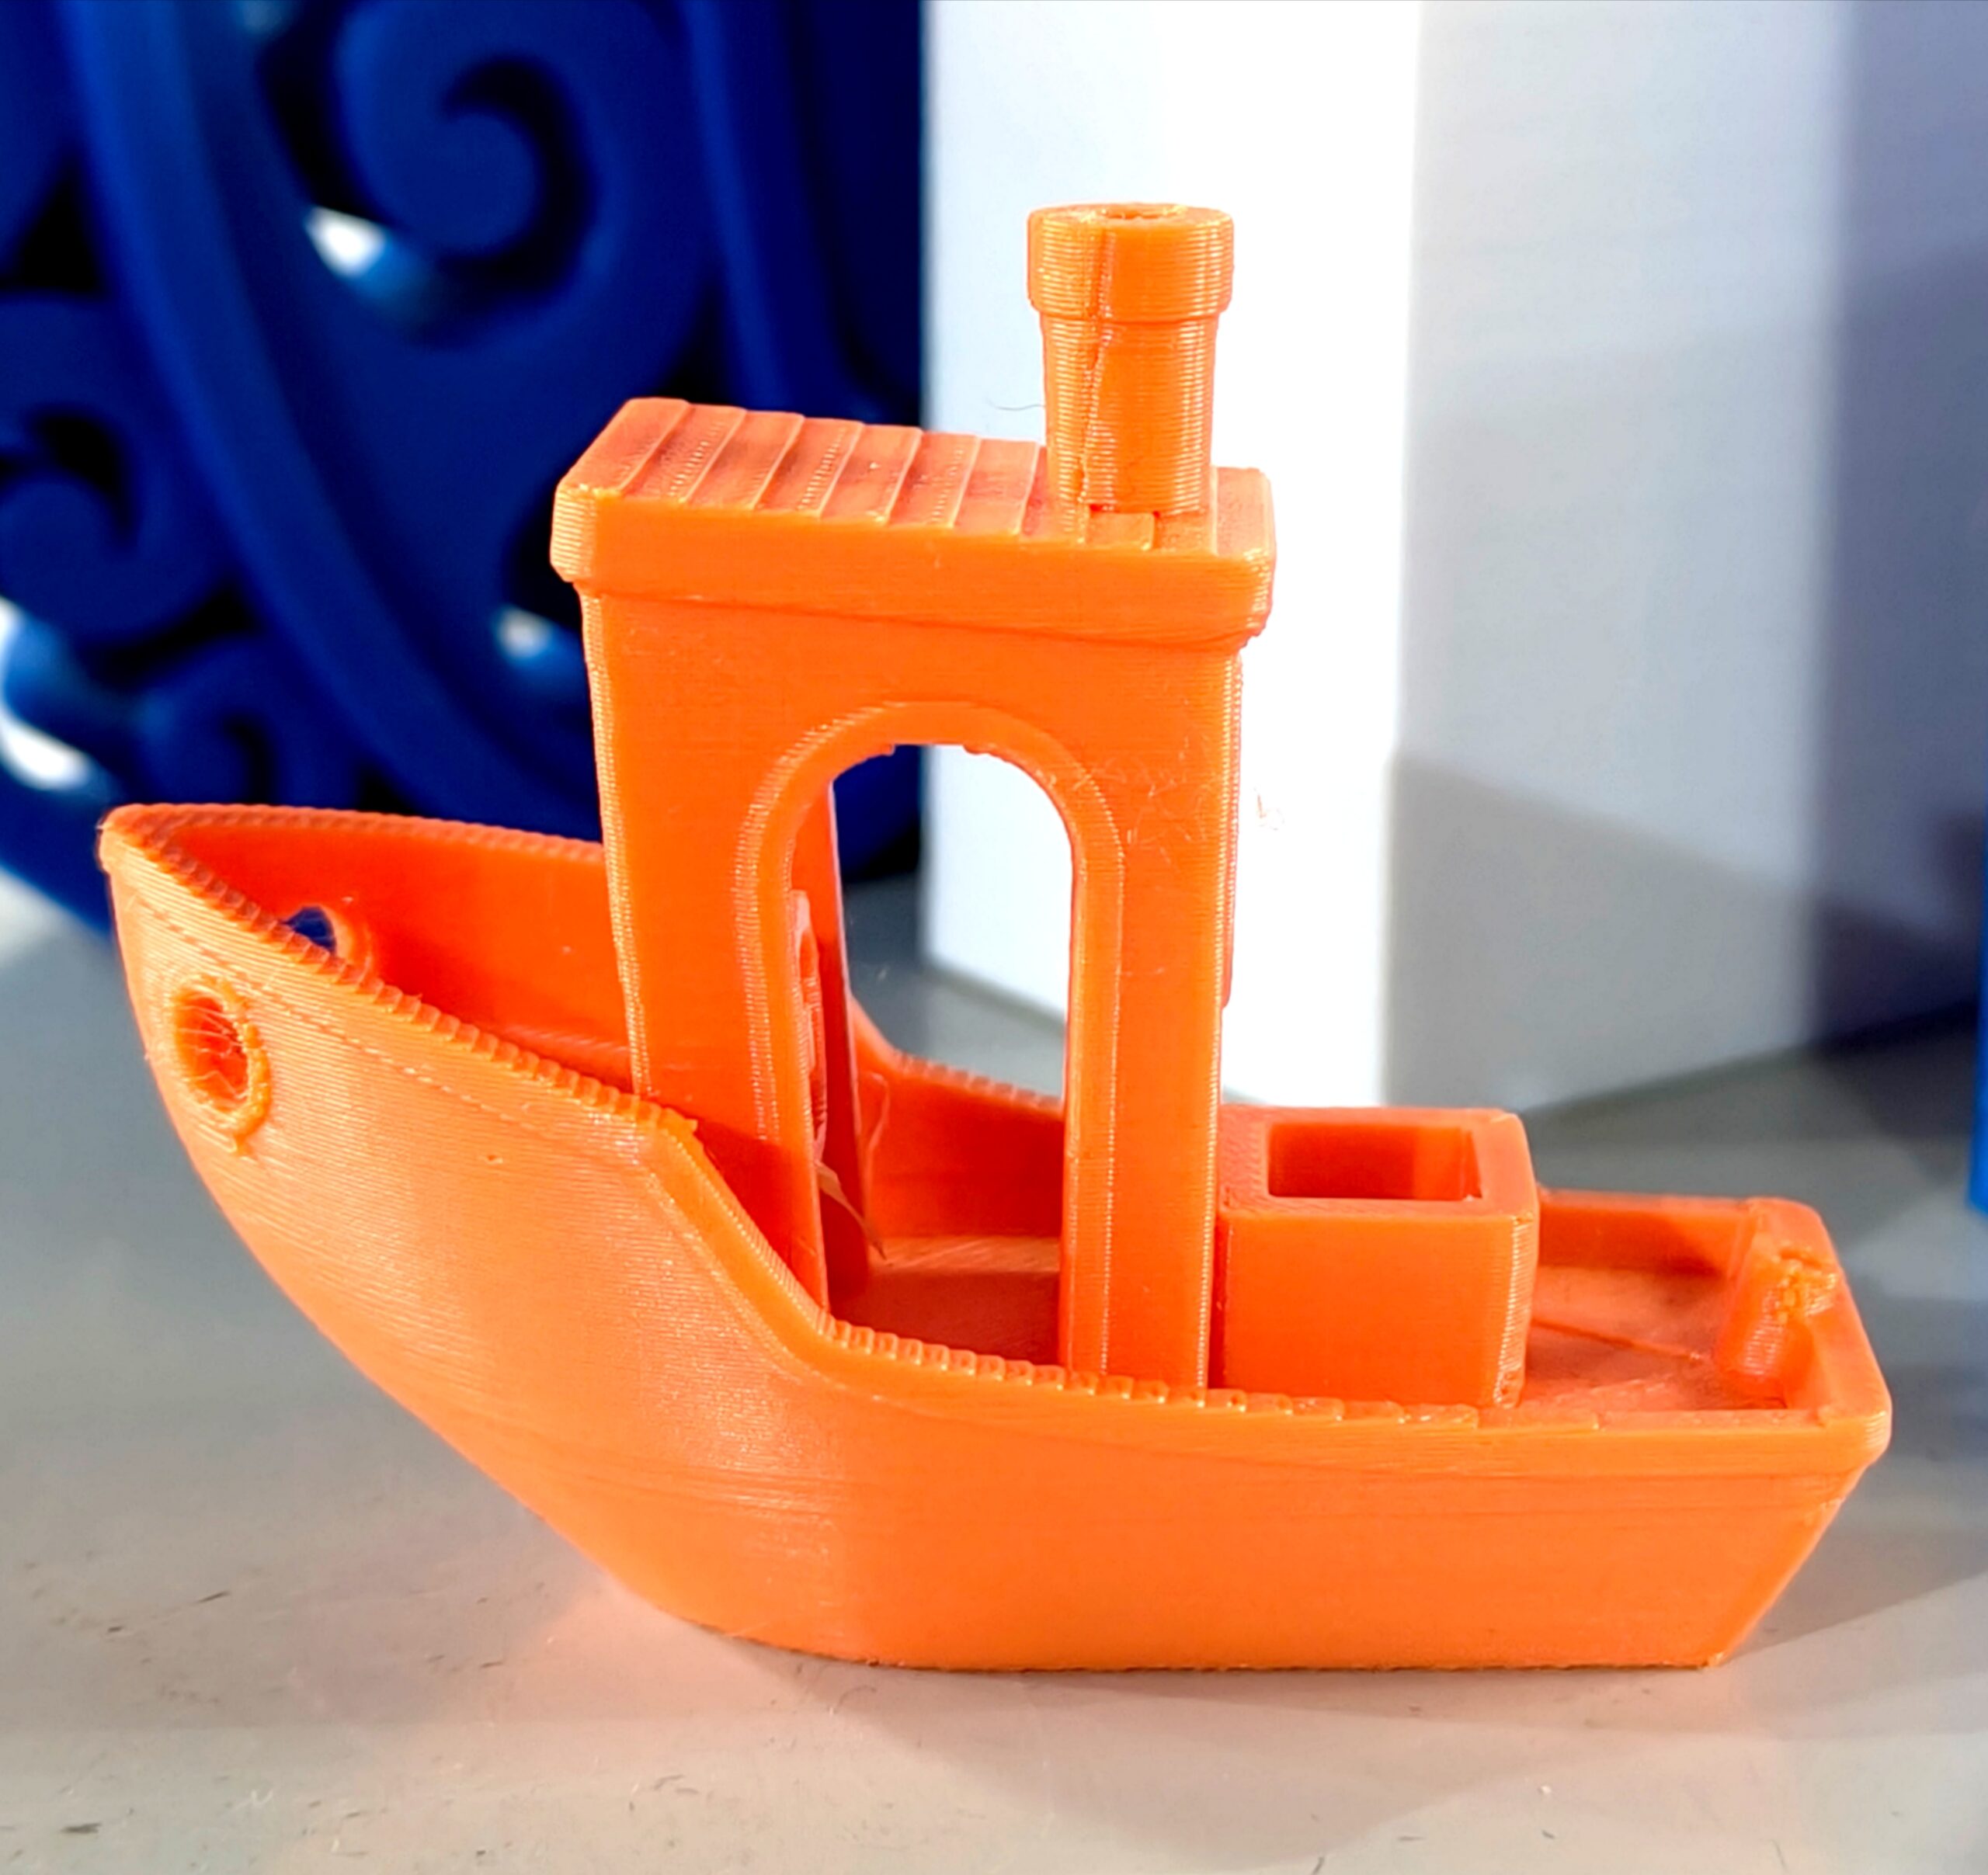
Running test models like calibration cubes or exposure towers is a reliable way to confirm that your printer, material, and slicer settings are working in harmony. Ultimately, quick intervention is key. Ending a failing print early is better than letting it continue for hours only to end in frustration. Make early checks part of your routine to maintain consistent 3D print quality and reduce downtime.
Post-Processing for Smooth, Professional Results
Even the best-calibrated printers can’t produce a perfectly finished object straight off the plate. That’s where post-processing comes in. It takes your raw prints—often rough or support-marked—and transforms them into polished, display-ready pieces.
For FDM prints, the most common post-processing step is sanding. Start with a coarser grit (around 200–300) to remove layer lines, then gradually work your way up to 800 or 1000 grit for a smooth finish. Priming and painting follow naturally, especially for presentation models or prototypes meant to simulate final products. Acetone vapor smoothing is another option, especially for ABS, and it works by slightly melting the outer layer to blur lines and give a glossy, molded look.
Resin prints, on the other hand, require more careful handling. Once the print is removed from the build plate, it should be cleaned in isopropyl alcohol (IPA) to remove excess uncured resin. Agitating the print while it soaks helps ensure all the residue is removed. Some users gently scrub the surface with a soft brush to get into tight spaces. We have a complete resource on cleaning 3D prints if you want to learn the professional method of cleaning 3D models for best results.
After washing, UV curing solidifies the resin completely and improves strength and surface hardness. A wash-and-cure station is ideal here, providing consistent exposure and rotation for even curing. Phrozen’s Wash & Cure Kit, for example, combines high-speed vortex cleaning with powerful 405nm UV lights for professional-grade results without over-curing or warping.
Finally, you can sand and paint resin prints just like FDM ones, though care must be taken to avoid scratching softer materials. If your model was printed using a pre-supported, professionally designed file, you’ll likely have fewer artifacts to clean up—saving time and preserving fine details that can be lost through excessive finishing work.
With proper post-processing, even a good print can become a great one—polished, durable, and ready for use, display, or final application.
Minimize Support-Related Failures
Supports are essential in both FDM and resin printing, especially when dealing with overhangs, bridges, or complex geometries. However, poorly placed or insufficient supports can lead to deformation, sagging, or even complete print failure. Worse, excessive or poorly tuned supports can damage surface details and increase post-processing work.
In FDM printing, slicers like Cura or PrusaSlicer give you control over support density, pattern, and angle. It’s often better to reduce support interface contact or use tree-style supports to avoid scarring visible surfaces. Consider reorienting the model to minimize overhangs entirely, which not only shortens print time but also improves the finished appearance.
With resin printers, the margin for error is smaller. Every unsupported island or sharp overhang can fail to cure properly, resulting in floating debris or failed geometry that affects the entire model. While auto-support tools in slicers like Lychee or ChiTuBox provide a good starting point, they often require manual tweaking—especially for intricate or fragile parts. That’s why it’s essential to understand how to use supports effectively. For a thorough explanation, be sure to check out our blog on 3D printing supports. It provides a complete guide on when and where to use supports, along with practical tips to ensure better print quality.
Moreover, even if you’re an expert, you’re bound to experience failed prints every now and then. If you’re specifically dealing with a resin 3D printer, we have a detailed guide for you: Top Resin Print Failures and How to Fix Them. It’s an exhaustive guide that teaches you the most common resin print failures, what causes them, and how to fix and prevent them. It’s a must-read especially if you’re a beginner.
Maintain Your Printer for Long-Term Quality
No matter how advanced your settings or how expensive your materials, printer maintenance is what keeps everything running smoothly. Regular upkeep ensures that your printer delivers consistent performance over time, avoiding frustrating quality dips and mechanical failures.
In FDM printers, components like belts, pulleys, lead screws, and extruders are all subject to mechanical wear. Loose belts can cause layer shifting, while a dirty nozzle can lead to under-extrusion or inconsistent flow. Make it a habit to inspect the belts for tension, clean the hotend regularly, and verify that the bed surface is free from debris and scratches.
For resin printers, most maintenance involves the build plate, vat, and FEP film. The FEP film should be clear and smooth—scratches, cloudiness, or punctures will impact print quality and can even cause adhesion failures. Replace it if you notice excessive clouding or repeated print failures. Also, keep the build plate clean and level, and check for any loose screws after removing large prints.
Don’t forget the Z-axis rails and lead screw, which need periodic lubrication. Resin drips, IPA overspray, or dust buildup can lead to binding or uneven motion, resulting in layer shifts or artifacts.
Lastly, keep your firmware updated and your slicer profiles current. Many print issues arise simply because users are running old versions of slicers that don’t reflect the latest machine parameters.
Quick Reference: Ideal Settings by Use Case
While every printer and material behaves slightly differently, having a general guide helps as a starting point. Below is a summary of settings that balance speed, detail, and reliability for both FDM and resin printing.
| Use Case | Technology | Layer Height | Exposure Time | Print Speed | Supports |
| Miniatures with Fine Detail | Resin | 0.025–0.05 mm | 5–8 sec (normal), 30–45 sec (bottom) | Medium | Heavy, angled |
| Mechanical Prototypes | FDM | 0.2–0.3 mm | N/A | High | Minimal, block style |
| Functional Parts | FDM | 0.15–0.2 mm | N/A | Medium | Moderate, tree supports |
| Jewelry or Dental | Resin | 0.025 mm | 8–12 sec | Slow | Dense, fine points |
| Display Models | Resin | 0.05 mm | 6–8 sec | Medium | Balanced, oriented to reduce scars |
Note: Always cross-check with your material’s official data sheet. For Phrozen resins, use the recommended resin profiles available on the Phrozen website to fine-tune your exposure times based on layer height and pigment density.
Consistency Comes from Control
Improving 3D print quality isn’t about one single fix—it’s a combination of hardware, materials, slicer settings, model preparation, and routine maintenance. The good news is that each small improvement adds up quickly. With time and practice, you’ll start producing smoother, sharper, and more reliable results across both FDM and resin workflows.
Frequently Asked Questions (FAQ)
How do I fix poor 3D print quality?
Start by checking basic settings: bed leveling, layer height, print temperature, and slicer configurations. Evaluate the quality of your model and ensure your materials are dry. For resin prints, proper exposure and support placement are especially important.
What’s the best layer height for high-detail prints?
For FDM, use 0.1 to 0.15 mm for fine results. For resin, 50 microns (0.05 mm) is ideal for balancing detail and speed. Extremely fine prints may require 25 microns or lower, but this increases print time significantly.
Should normal exposure be higher for better build plate adhesion?
Not typically. Bottom layers should have longer exposure for adhesion, while normal exposure should be optimized to cure each layer without over-curing. Too much exposure can cause loss of detail or warping near the base.
How can I improve resin surface quality?
Use high-resolution resins, optimize exposure, ensure your FEP film is clean, and post-process carefully. Avoid under-curing or resin contamination. Starting with clean, well-supported models helps avoid layer artifacts and surface blemishes.
Do verified models actually make a difference?
Yes. Pre-supported models created by experts eliminate the guesswork in orientation, support density, and slicer configuration. Especially in resin printing, verified files help reduce failure rates and achieve professional-grade quality even on the first attempt.